
How to Trick AI Detectors: Weaknesses, Exploits, and the Future
I always had a gut feeling that AI Detectors are not reliable and shouldn’t be trusted. I didn’t have any real proof to back up this feeling, so I wanted to try it myself.
I started writing this post to get false negatives and false positives from both text and image detectors. But while doing the experiments, I learned a lot about how these detectors work and what their limitations are.
So, this post goes beyond just tricking them. We will dive into the mechanics of how these detectors work, why they are so easily deceived, and what the future of AI detection looks like.
False Negative: When the content is AI-generated, but the detector says it’s real/authentic.
False Positive: When the content is real/authentic, but the detector says it’s AI-generated.
I used Gemini 3 Pro for text generation and Nano Banana Pro for image generation.
AI Text Detectors
First, I wanted to try AI text detectors. But first, we need to know how AI text detectors work.
LLMs are like the word suggestions on your phone keyboard. They predict the next word based on the previous words, but with an attention to the current context. So, AI-generated text tends to be more predictable and less diverse than text written by a human.
These detectors look for just that. They analyze the text for patterns that are more likely to be produced by AI, such as repetitive phrases, lack of personal feeling, or overly formal language.
False Negative
I’m sure you know the common tricks like adding double spaces, random commas or intentional typos. But those are too obvious to the human eye and makes the text look unprofessional. I wanted to bypass detection without sacrificing the quality of the output.
LLMs are probabilistic engines. If you give them a vague prompt, they default to the most statistically probable (and therefore most ‘AI-like’) phrasing. However, if you constrain the model with a specific style guide or source material, you force it away from those generic patterns, making detection much harder.
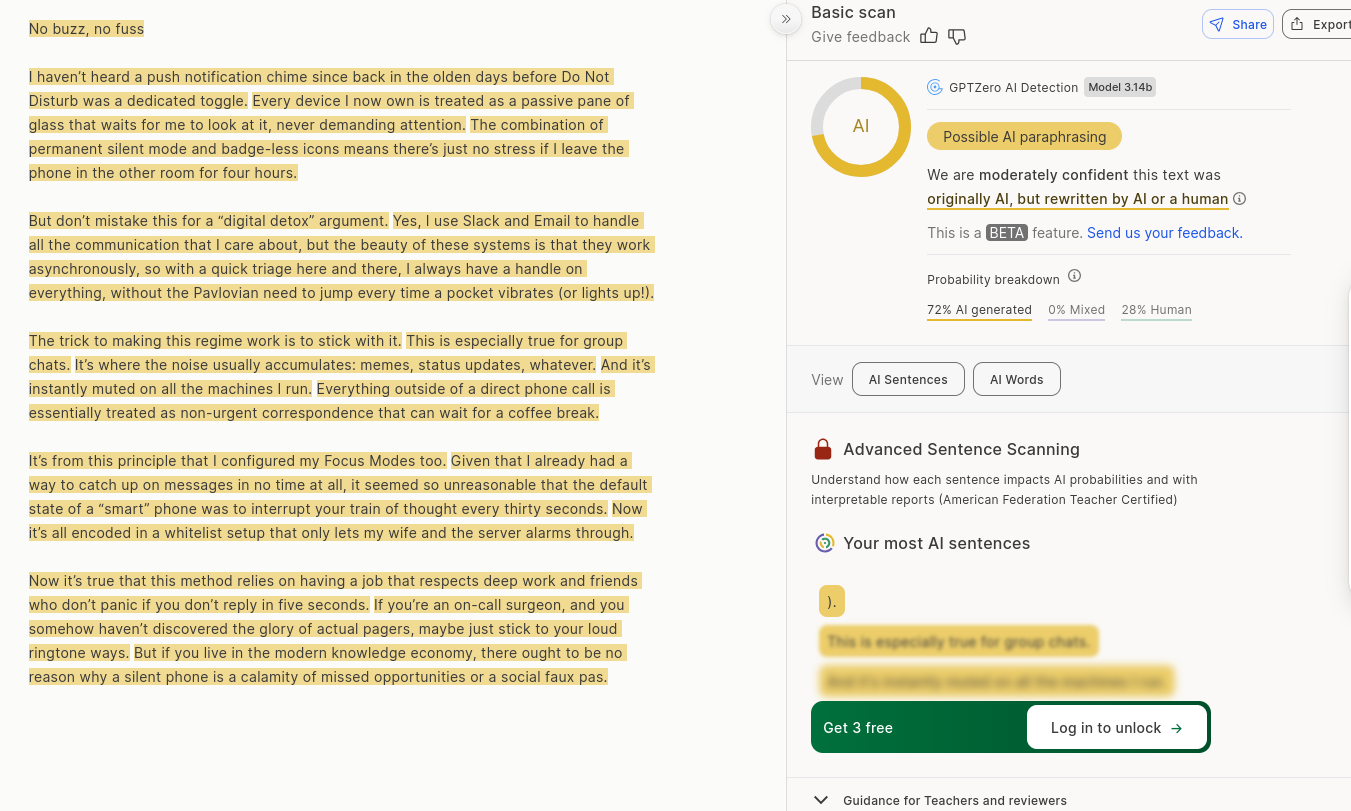
So I tried just that. I used one of DHH’s blog posts for this. I copied the full post and asked Gemini to write a blog post about a different topic using this post as a reference. Keep the flow, style, and feeling. Make it like it was written by the same person. I haven’t heard a push notification chime since back in the olden days before Do Not Disturb was a dedicated toggle. Every device I now own is treated as a passive pane of glass that waits for me to look at it, never demanding attention. The combination of permanent silent mode and badge-less icons means there’s just no stress if I leave the phone in the other room for four hours. But don’t mistake this for a “digital detox” argument. Yes, I use Slack and Email to handle all the communication that I care about, but the beauty of these systems is that they work asynchronously, so with a quick triage here and there, I always have a handle on everything, without the Pavlovian need to jump every time a pocket vibrates (or lights up!). The trick to making this regime work is to stick with it. This is especially true for group chats. It’s where the noise usually accumulates: memes, status updates, whatever. And it’s instantly muted on all the machines I run. Everything outside of a direct phone call is essentially treated as non-urgent correspondence that can wait for a coffee break. It’s from this principle that I configured my Focus Modes too. Given that I already had a way to catch up on messages in no time at all, it seemed so unreasonable that the default state of a “smart” phone was to interrupt your train of thought every thirty seconds. Now it’s all encoded in a whitelist setup that only lets my wife and the server alarms through. Now it’s true that this method relies on having a job that respects deep work and friends who don’t panic if you don’t reply in five seconds. If you’re an on-call surgeon, and you somehow haven’t discovered the glory of actual pagers, maybe just stick to your loud ringtone ways. But if you live in the modern knowledge economy, there ought to be no reason why a silent phone is a calamity of missed opportunities or a social faux pas.AI Generated Post
No buzz, no fuss
I gave the output to the most popular AI text detectors and got these results:
GPTZero guessed correctly that the text is AI-generated:
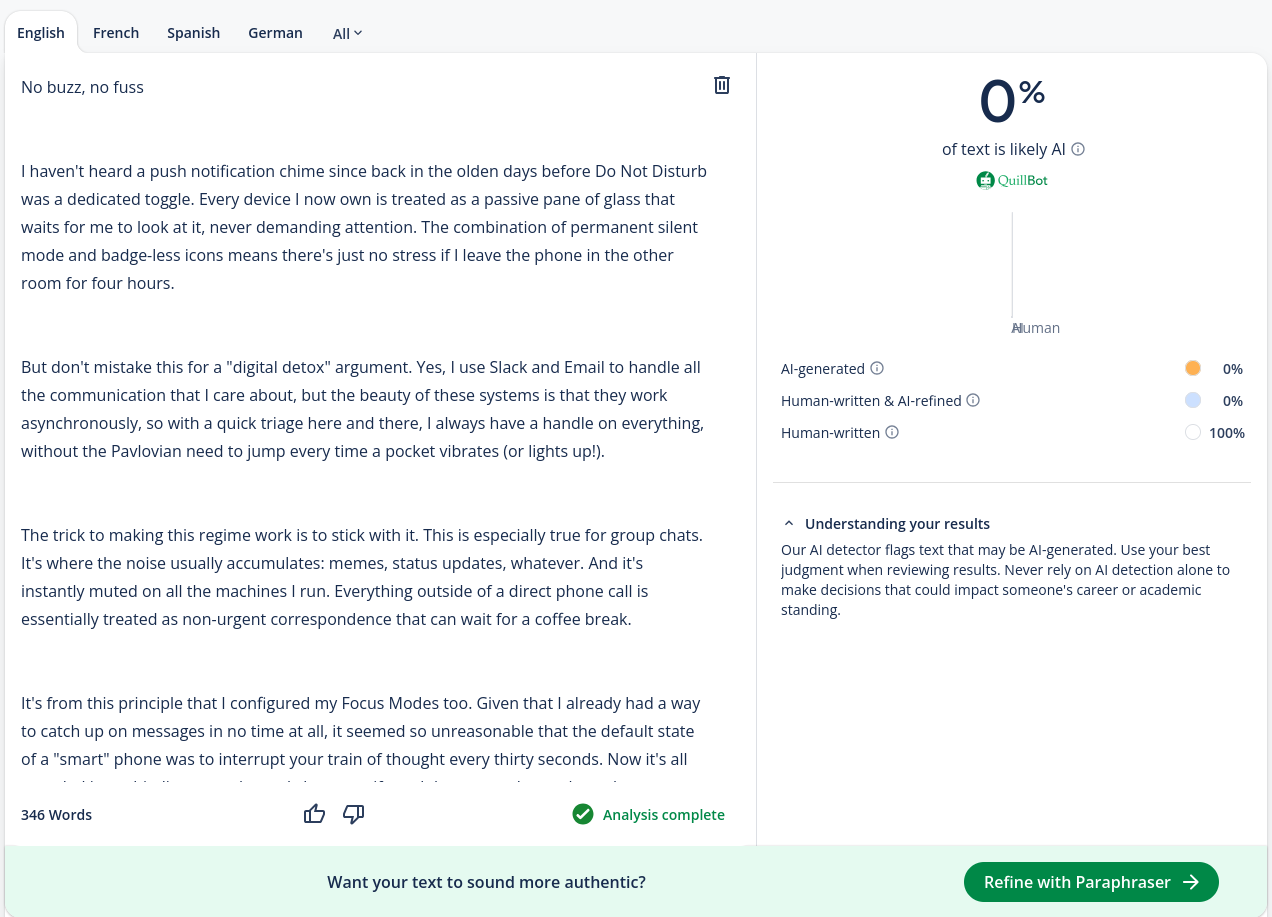
But QuillBot failed and thought the text was 100% human-written:
I wasn’t satisfied with this result yet, so I generated another post from the same prompt (changed nothing from the prompt, just generated again). I haven’t docked to a dual-screen setup since back in the olden days before Retina and Mission Control. Every laptop I now own is treated as a self-sufficient, complete console that can be opened, shut, or moved without disconnection. The combination of high-resolution density and gesture-based switching of all important windows means there’s just no panic if I’m away from the desk. But don’t mistake this for just a “minimalist travel” argument. Yes, I use the internal display to hold all the code that I care about, but the beauty of a single screen is that it works with the focus of that code, so with a couple of swipes here and there, I always have a massive view of everything, in case the need for documentation should pop up (or take over!). The trick to making this regime work is to stick with it. This is especially true for font sizing. It’s where everything of importance needs to fit: terminals, browsers, whatever. And it’s instantly readable on all the machines I run. Everything outside of the main viewport is essentially treated as a distraction that’s fully hidden. It’s from this principle that I set up my window management too. Given that I already had a way to snap all terminals and editors onto a single glass in no time at all, it seemed so unreasonable that the configuration needed for a multi-monitor rig still took dongles on end. Now it’s all encoded in a muscle memory that settles in two seconds on a standard table. Now it’s true that this method relies on both good vision and a decent screen panel. If you’re stuck on a TN panel in the middle of a basement, and you somehow haven’t discovered the glory of high-DPI, maybe just stick to your old massive battlestation ways. But if you live in the modern world, there ought to be no reason why a single screen is a calamity of cramped space or a long adjustment process.Second AI Generated Post
No monitors, no anchor
This time GPTZero failed too:

It was really easy to trick these detectors with a specific prompt. If you have a homework assignment or an article to write, you can easily use this method to avoid AI detection. You can find a similar article written by a human, give that article with your materials to the AI, and ask it to write about your topic in the same style.
These tools shouldn’t be trusted, and their results shouldn’t be taken that seriously. GPTZero acknowledges that; they have a browser extension to record your writing on Google Docs to use as a better way to prove that you are writing it yourself, representing a safety measure against false accusations. They know that their detector’s results shouldn’t be the only proof.
And look at QuillBot’s screenshot again. At the bottom, there is a banner for their paraphrasing tool. They are literally trying to sell you a tool to save you from AI detection. So how can you trust that they won’t artificially increase the AI detection rate to promote their paraphrasing tool? Can we trust a judge who also sells ‘get out of jail free’ cards?
False Positive
For false positives, we need to convince the AI detectors that human-written text is actually AI-generated.
There are examples on the internet like Bible verses or Shakespeare texts being detected as AI-generated. That is because AI models are trained on a lot of data from the internet, and those texts are very common on the web. So AI models have seen those texts a lot and learned to generate similar text. You could say they are overfitted, and the detectors see those patterns as AI-generated.
But I wanted to try another way. AI-generated text tends to be more formal and less personal. So something like technical documentation or a news article can be easily mistaken as AI-generated text. I copied the first paragraphs of Docker’s documentation.
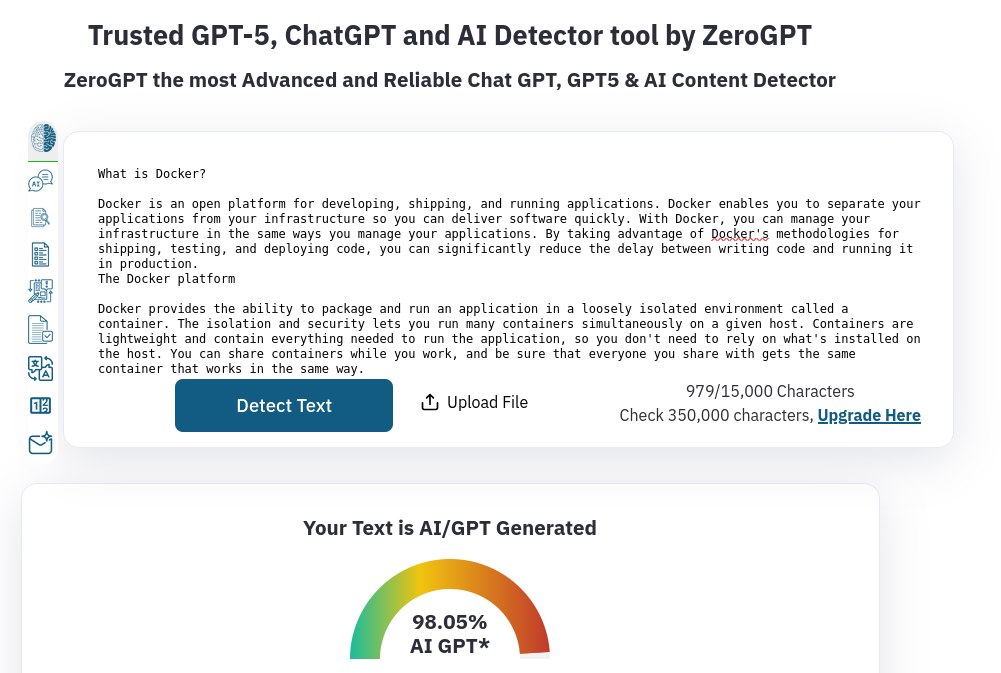
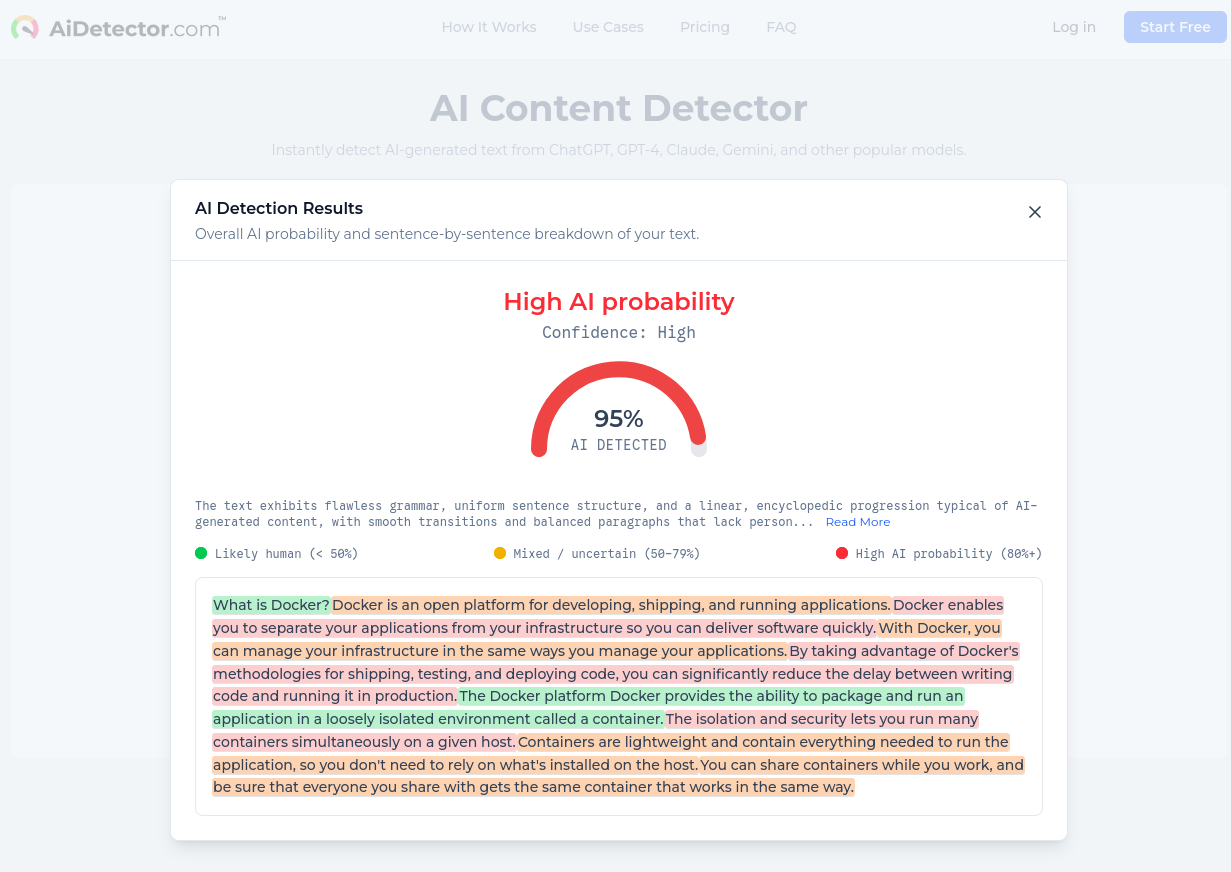
AiDetector and ZeroGPT (not GPTZero, a different service) both thought the text was AI-generated with very high confidence.
Actually, I have to give credit to GPTZero here. It was hard to trick it for false positives. I tried multiple different technical documentations and news articles, but GPTZero always guessed correctly that they were human-written. They are used by many schools and teachers; it would be bad for them to have a lower bar for false positives since it could lead to unfair accusations and punishments. That also makes it easier to trick for false negatives, as we saw before. But this still doesn’t mean if it thinks the given input is AI-generated, that person used AI. Like I said, they made a web extension because their detector results aren’t 100% reliable.
So the text detectors failed. Now let’s see the image detectors.
AI Image Detectors
This was actually the part I was most excited about. I had so many ideas to trick these AI image detectors.
False Negative
For false negatives, I wanted to try generating an image with AI and trick the detectors into thinking it’s a real image.
Like I said before, if your prompt has empty space for AI’s interpretation, it will fill that space with generic patterns. That is the same with images to an extent. So we need to give a very specific prompt again. Actually, they are looking for more than that, but we will get to that later.
For this, I wanted to do the same thing again: use real content as a reference. I chose this picture I took at my school with my phone:
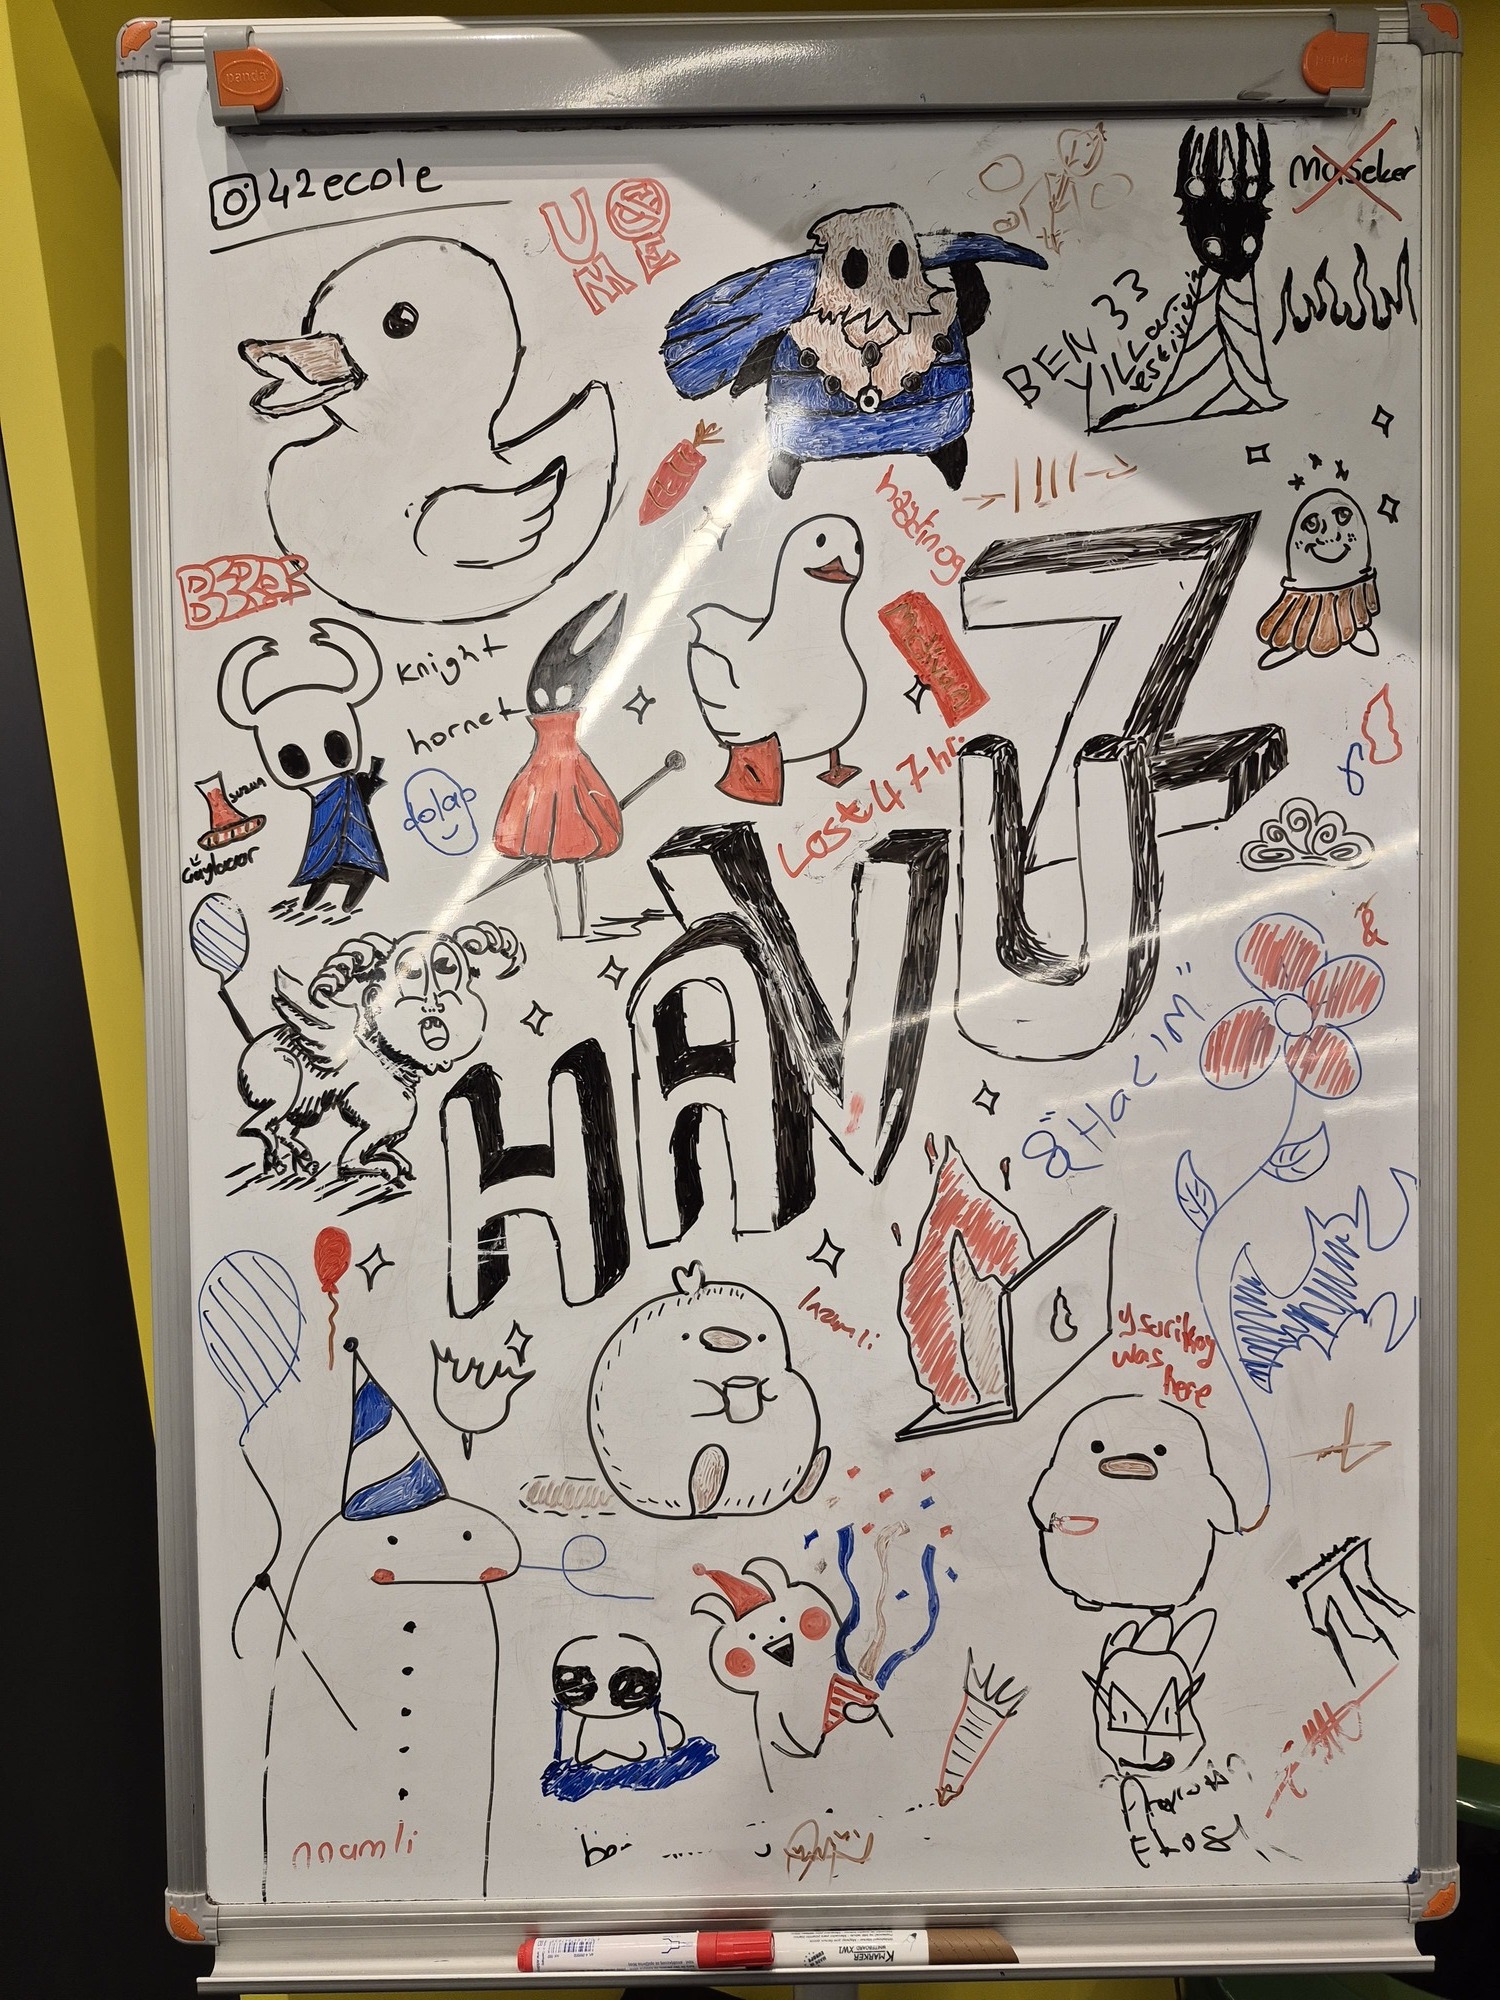
I pasted it to Gemini, prompted it to explain the picture in detail, opened a new chat and gave that explanation to Nano Banana Pro to create an image with this description.
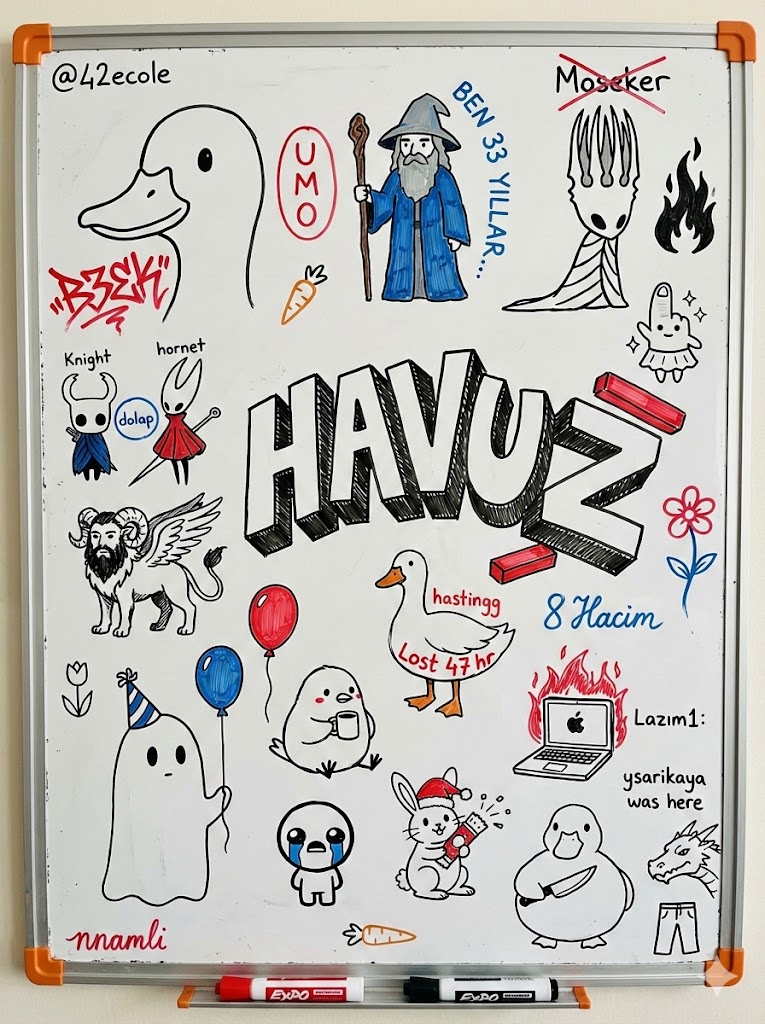
I downloaded the image (not a screenshot, that will be important in a minute) and wanted to try it without changing anything so I could use that result as a control group and gradually change the image to see the change in detector results.
I had ideas like
- Change the EXIF data with a real picture’s EXIF data
- Remove the small Gemini AI icon from the corner
- Flip the image
- Crop the image
- Add noise to the image
- Add a slight blur to the image
- Change the perspective slightly
When it comes to AI image detectors, they are so bad that it’s disappointing. I had so many ideas to try to trick those detectors, but they didn’t even give me a chance.
Here are a few of the most popular AI image detectors’ results for the original AI-generated image:
isgen.ai thought the image is 100% real:
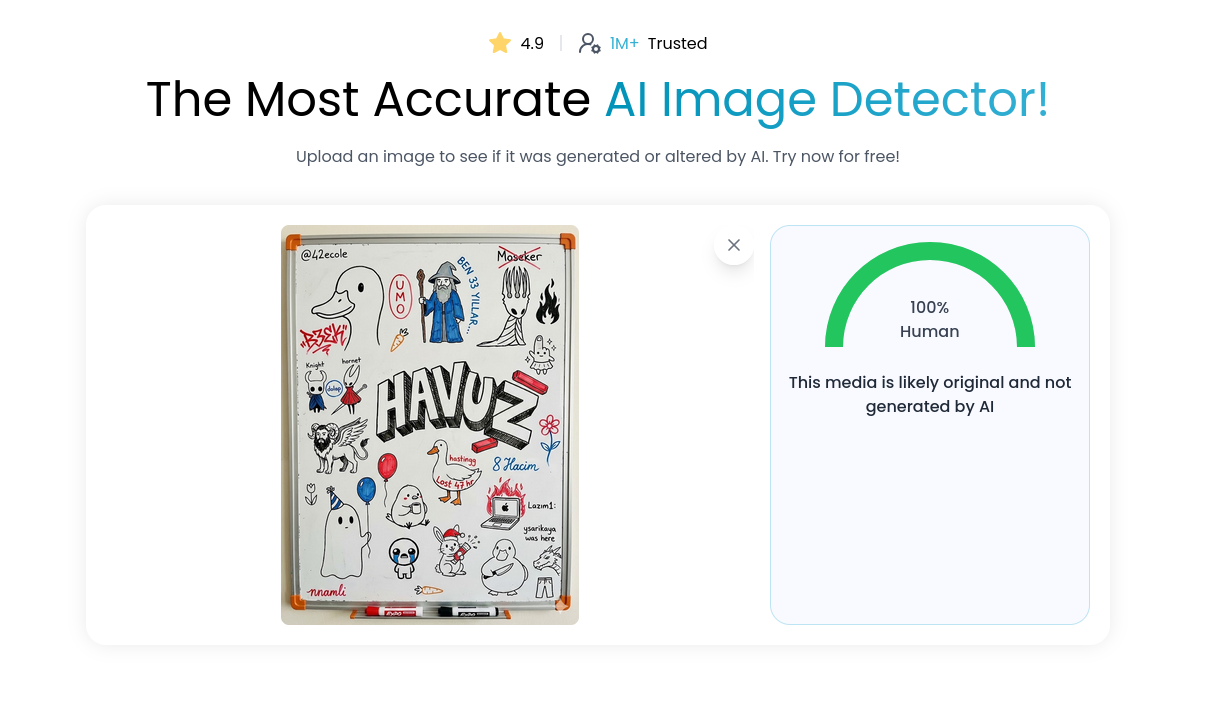
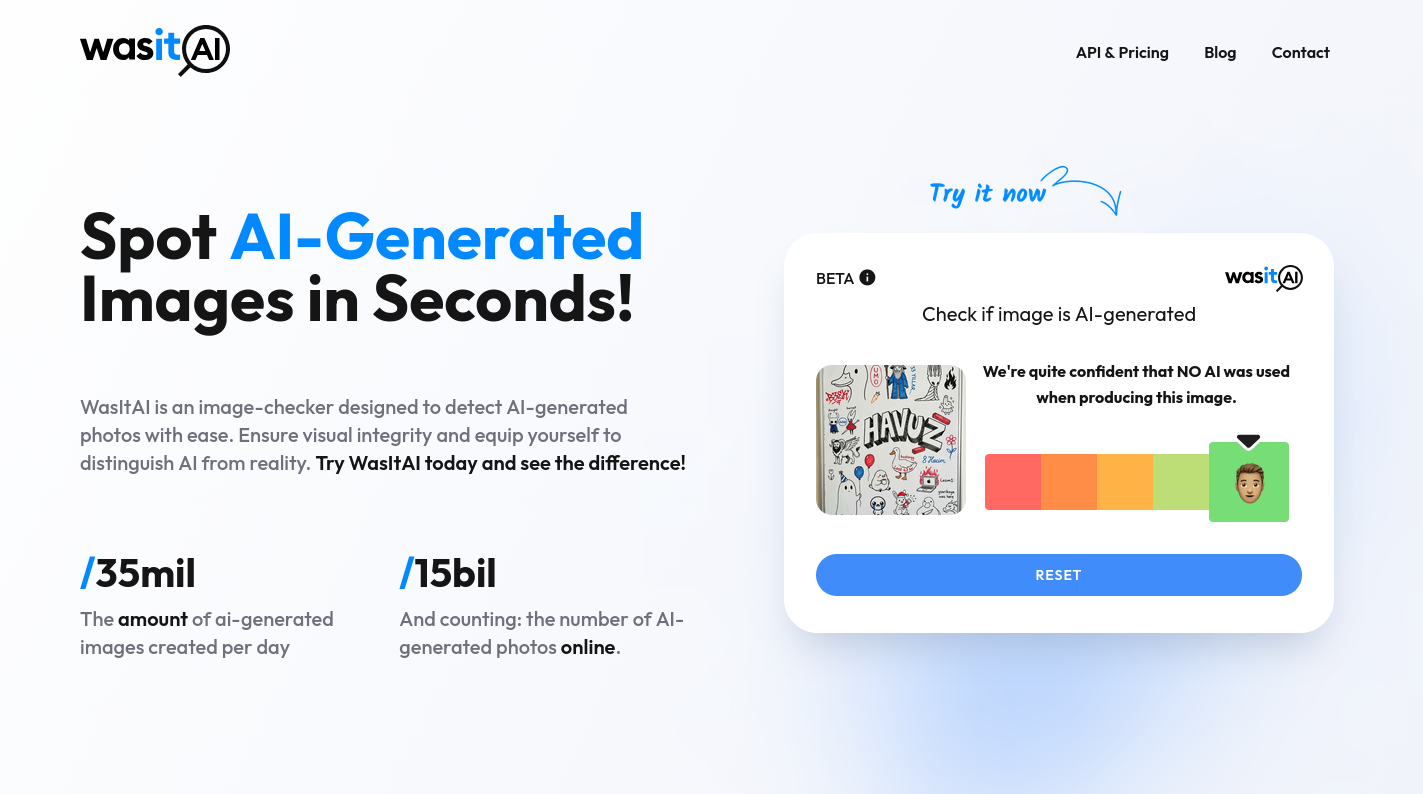
wasitai.com also thought the image is 100% real:
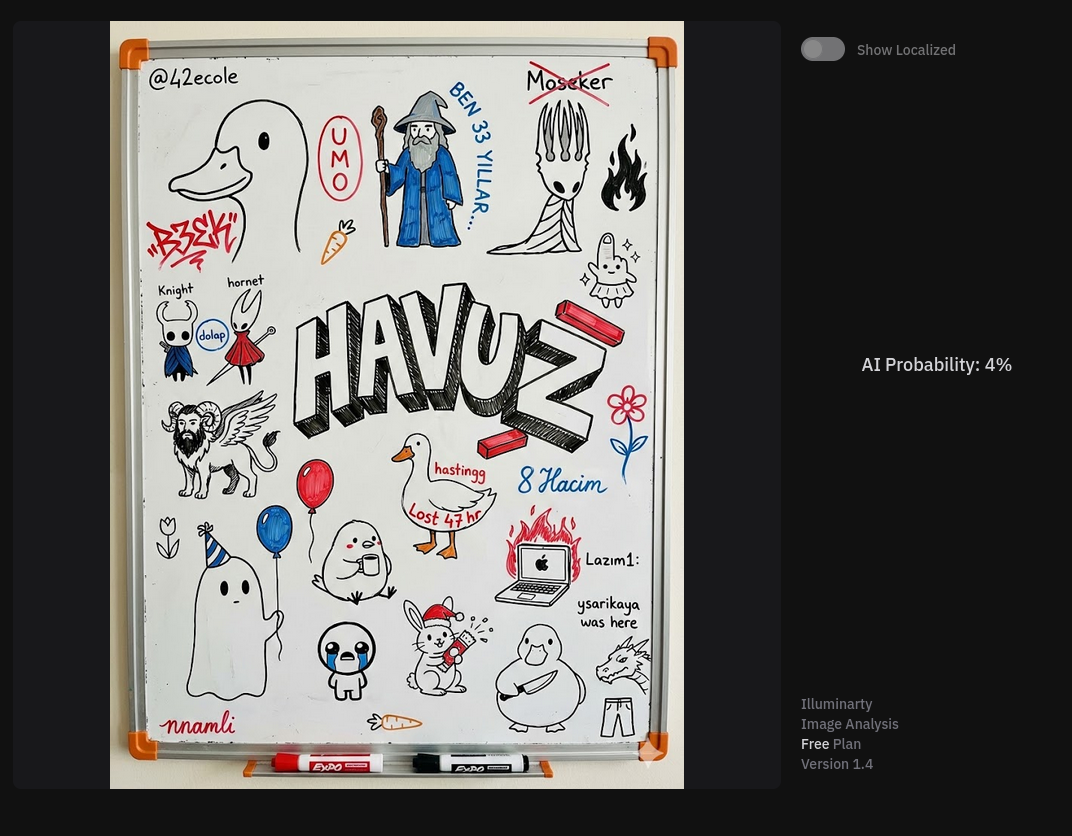
illuminarty.ai also thought the image is 96% real:
I hadn’t even tried yet, and a few of the most popular AI detectors failed already. Even with the Gemini marker at the corner. As I said, I didn’t even took the screenshot of the image, I downloaded the actual image file and it has these as it’s EXIF data:
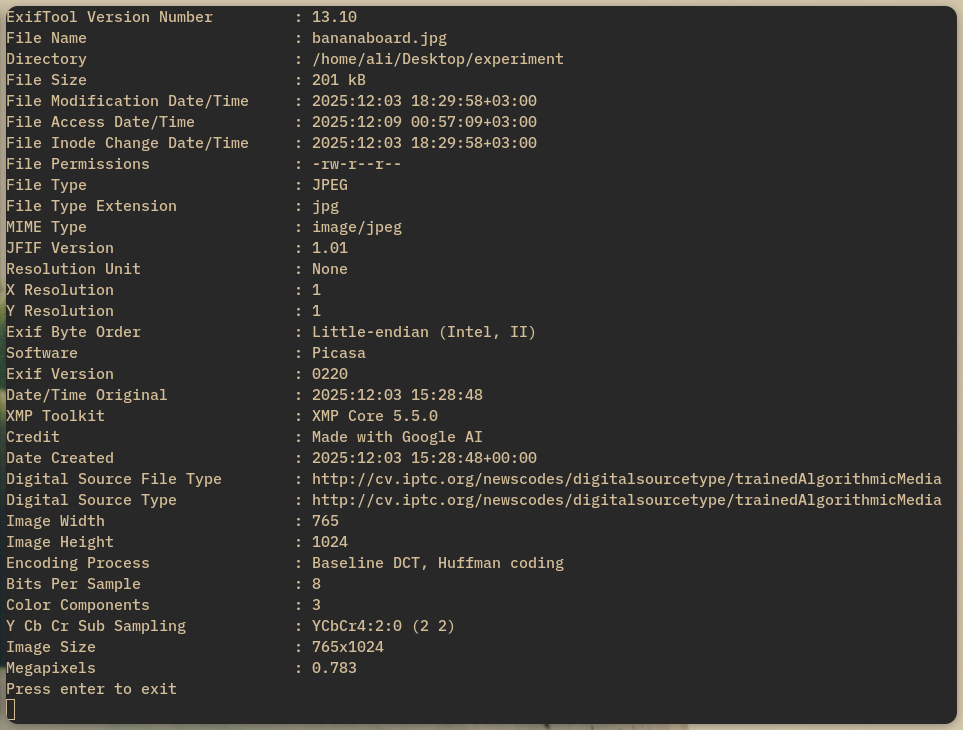
Look at the Credit field. It literally says Made with Google AI. They took this image, inspected it and said it was 100% real.
Giving results based on EXIF data is not a reliable method either, but we will get to that later.
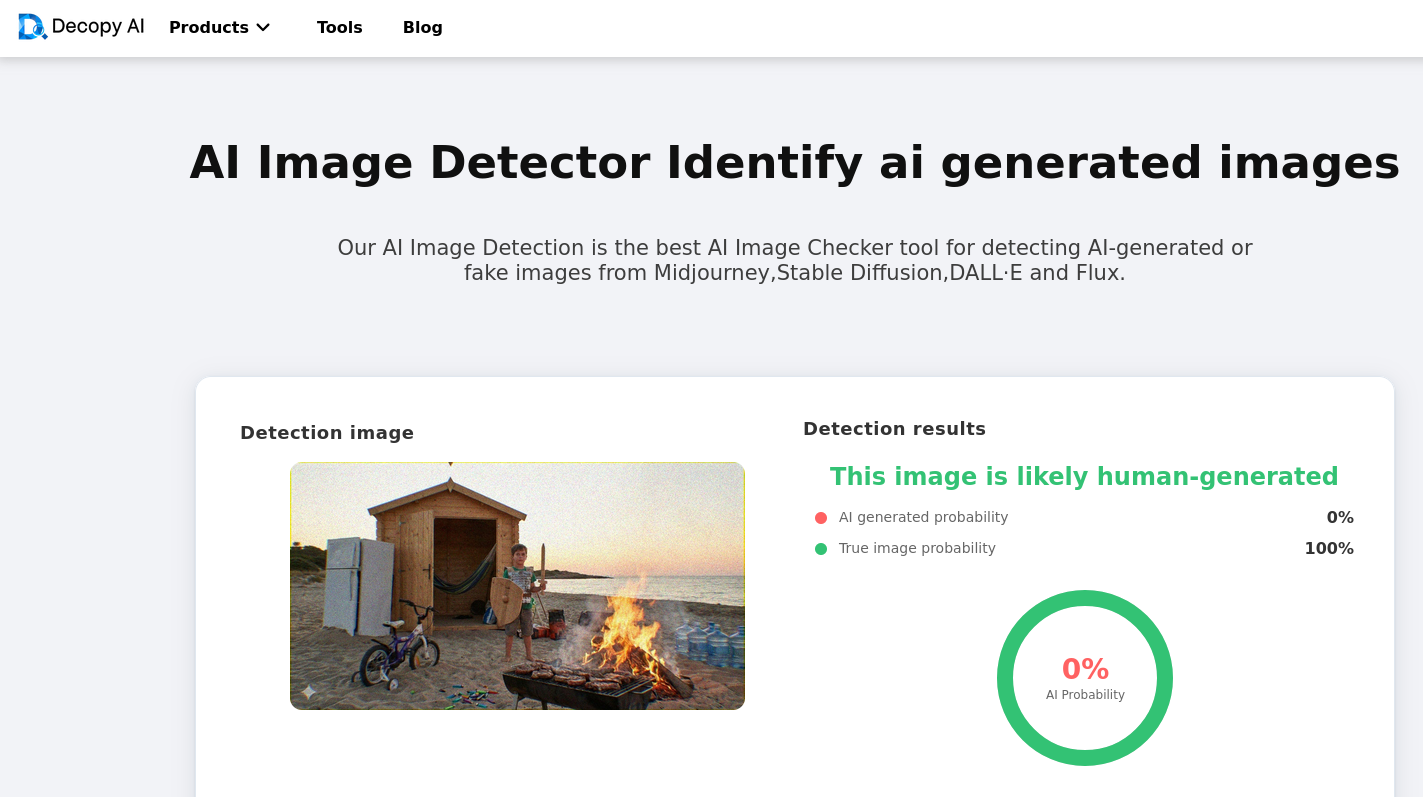
But there were a few services that performed better, like decopy.ai and reversely.ai, but they had problems too.
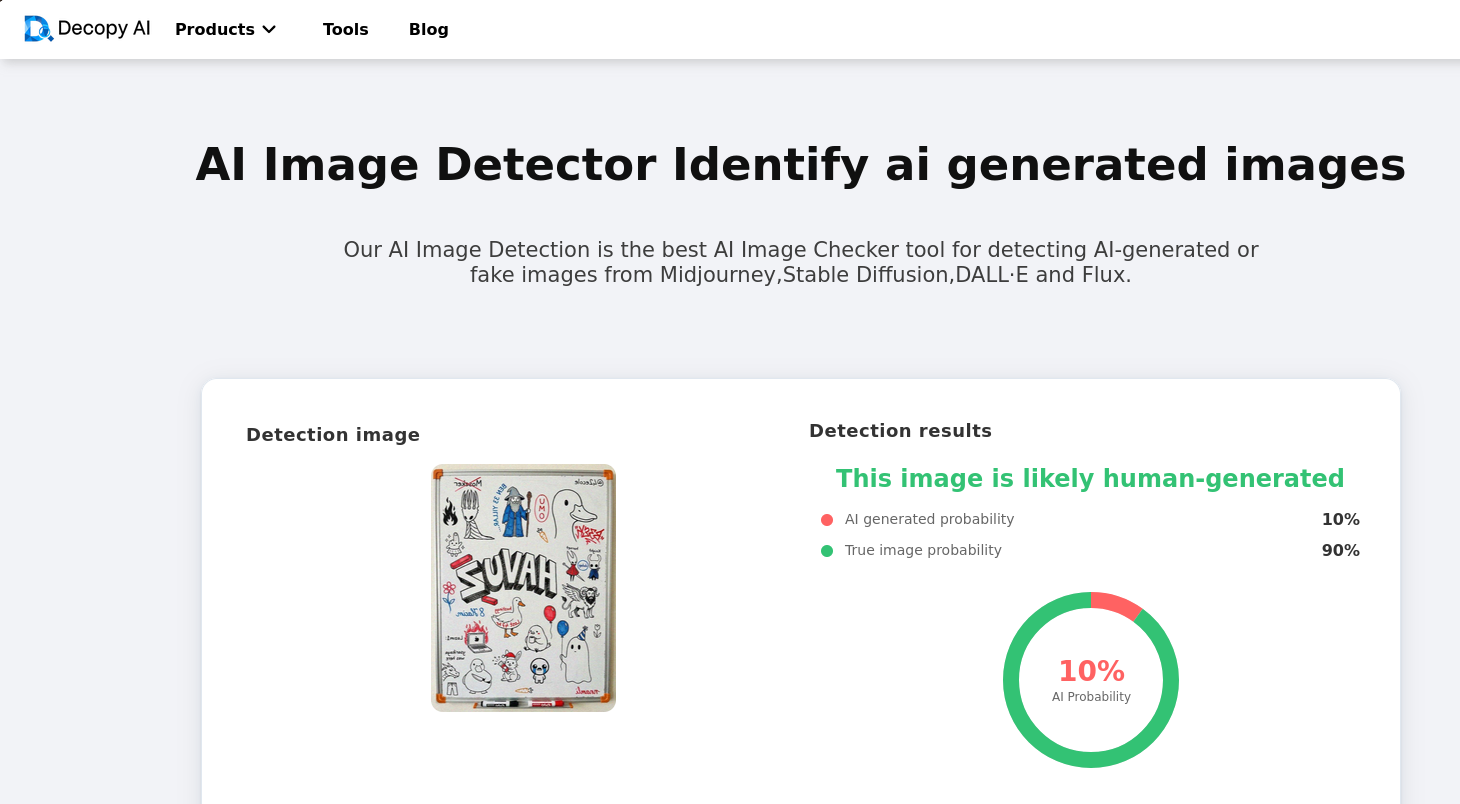
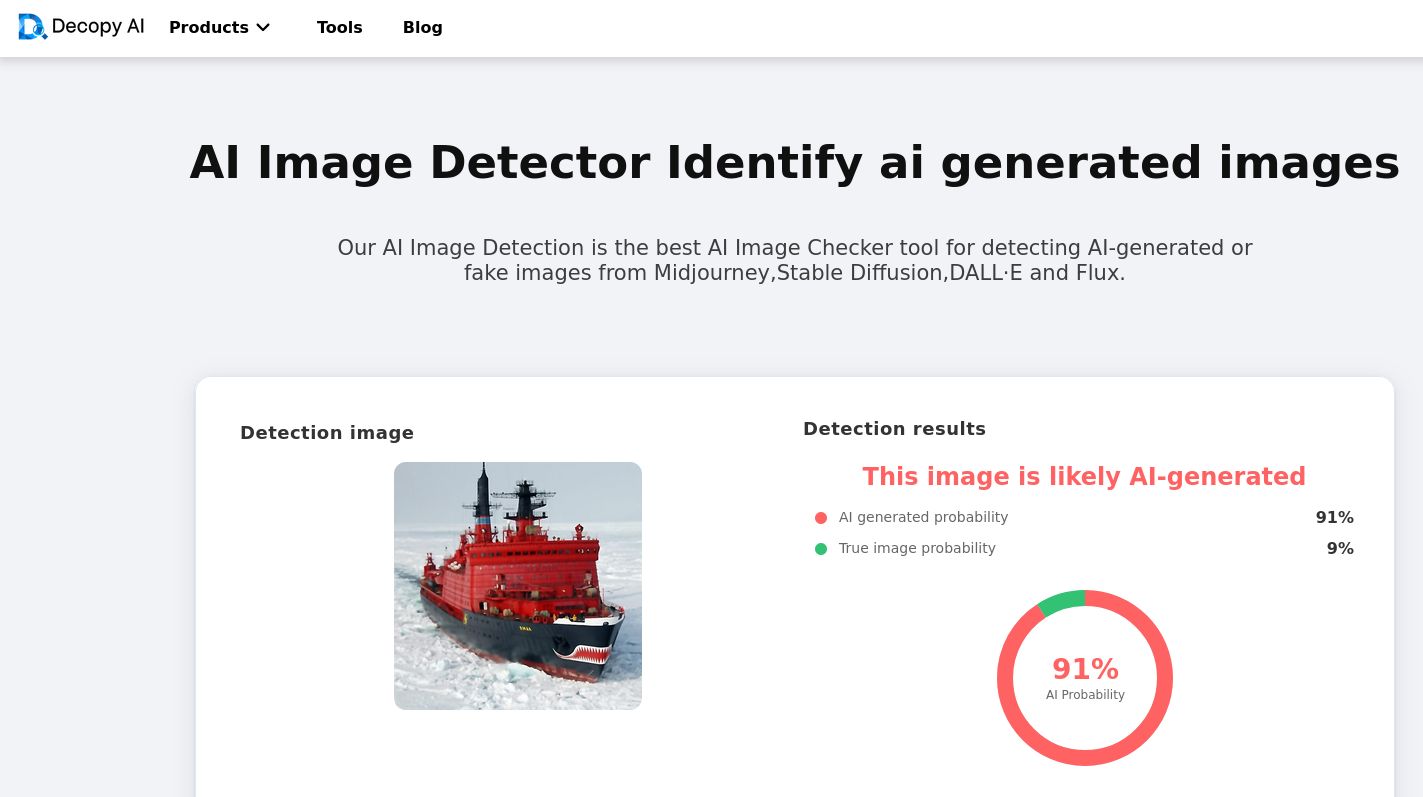
Look at the result from decopy.ai:
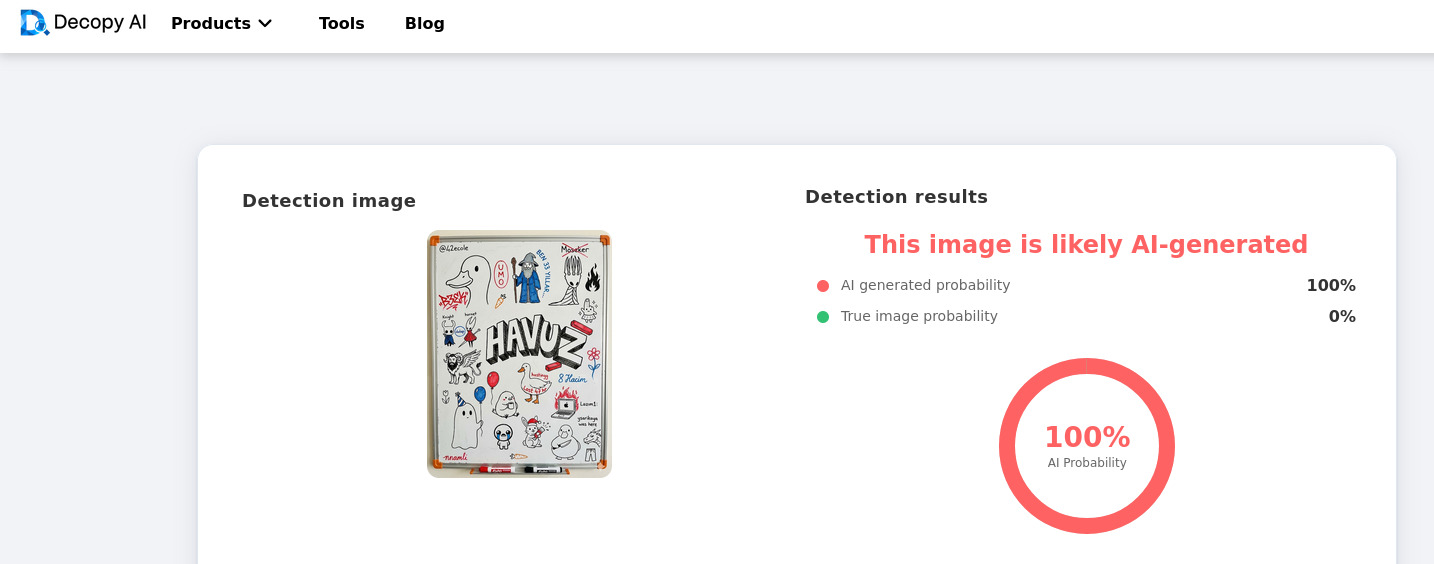
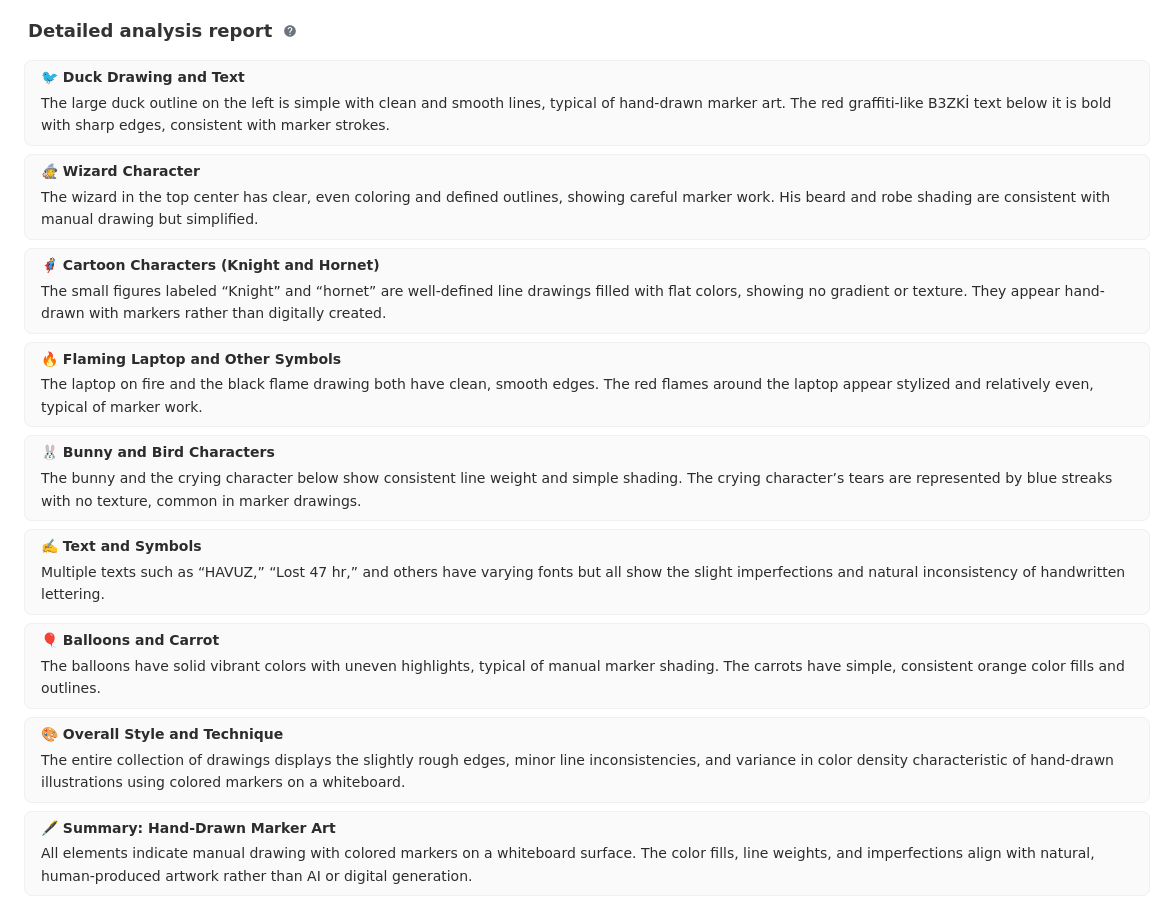
It seems like it guessed correctly, but at the bottom of this result, it gives a breakdown of the analysis, and it seems like the two algorithms are completely separate things because every point in the description says the image is real:
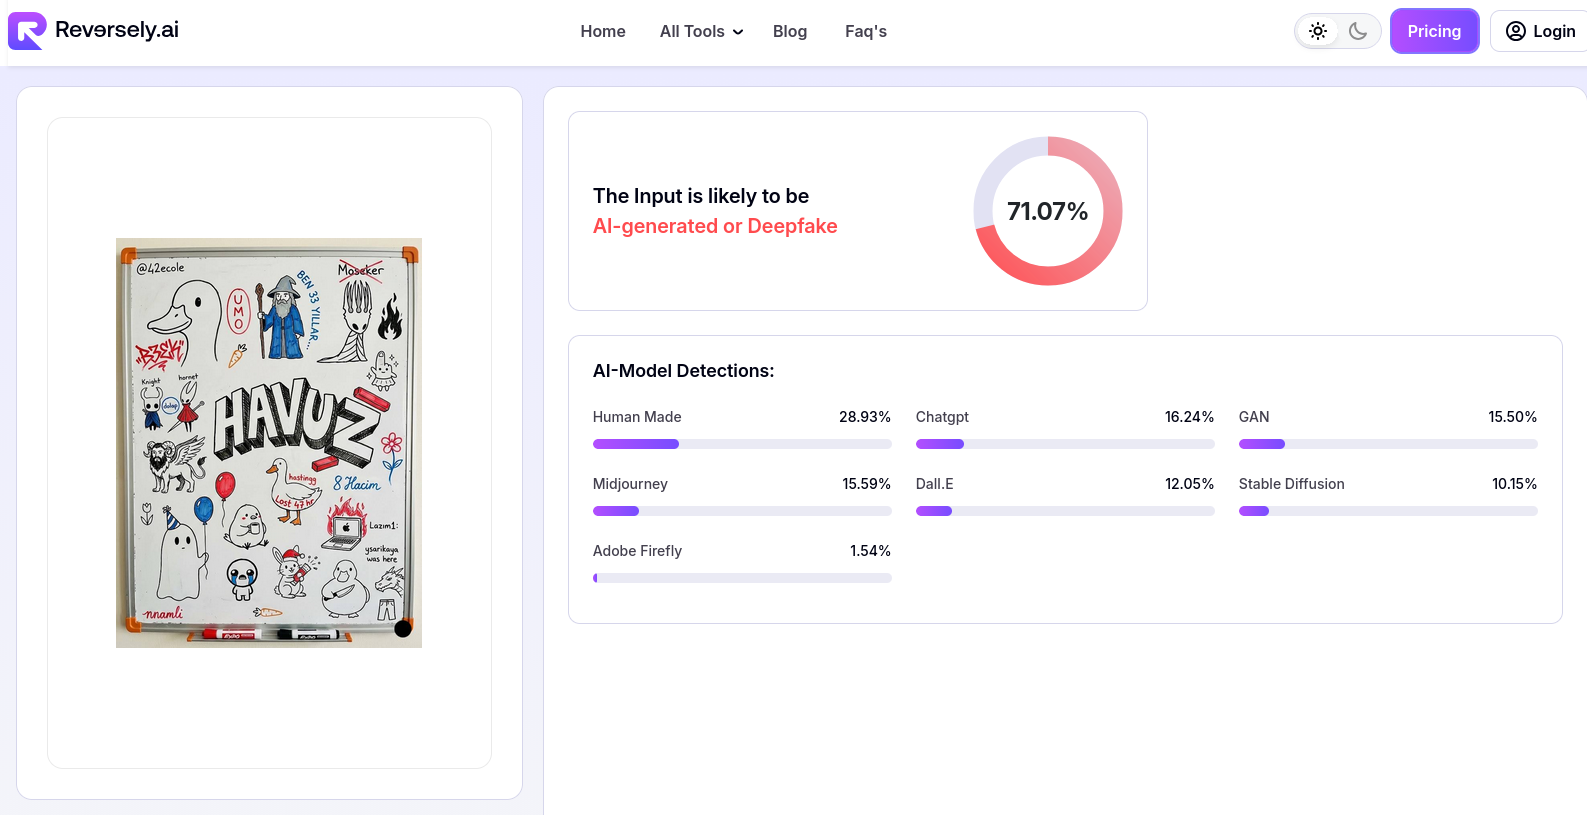
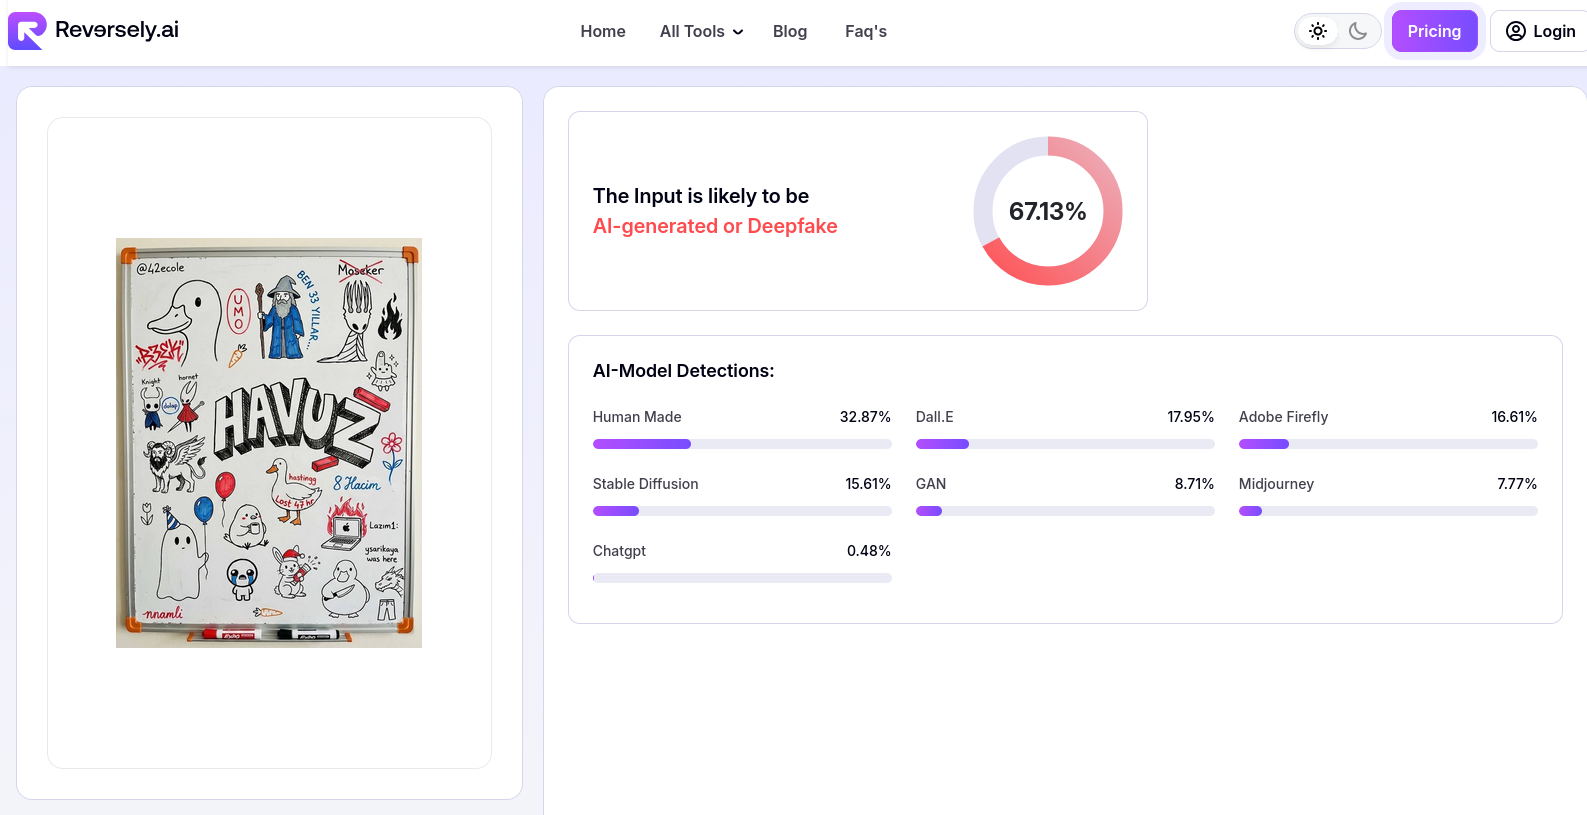
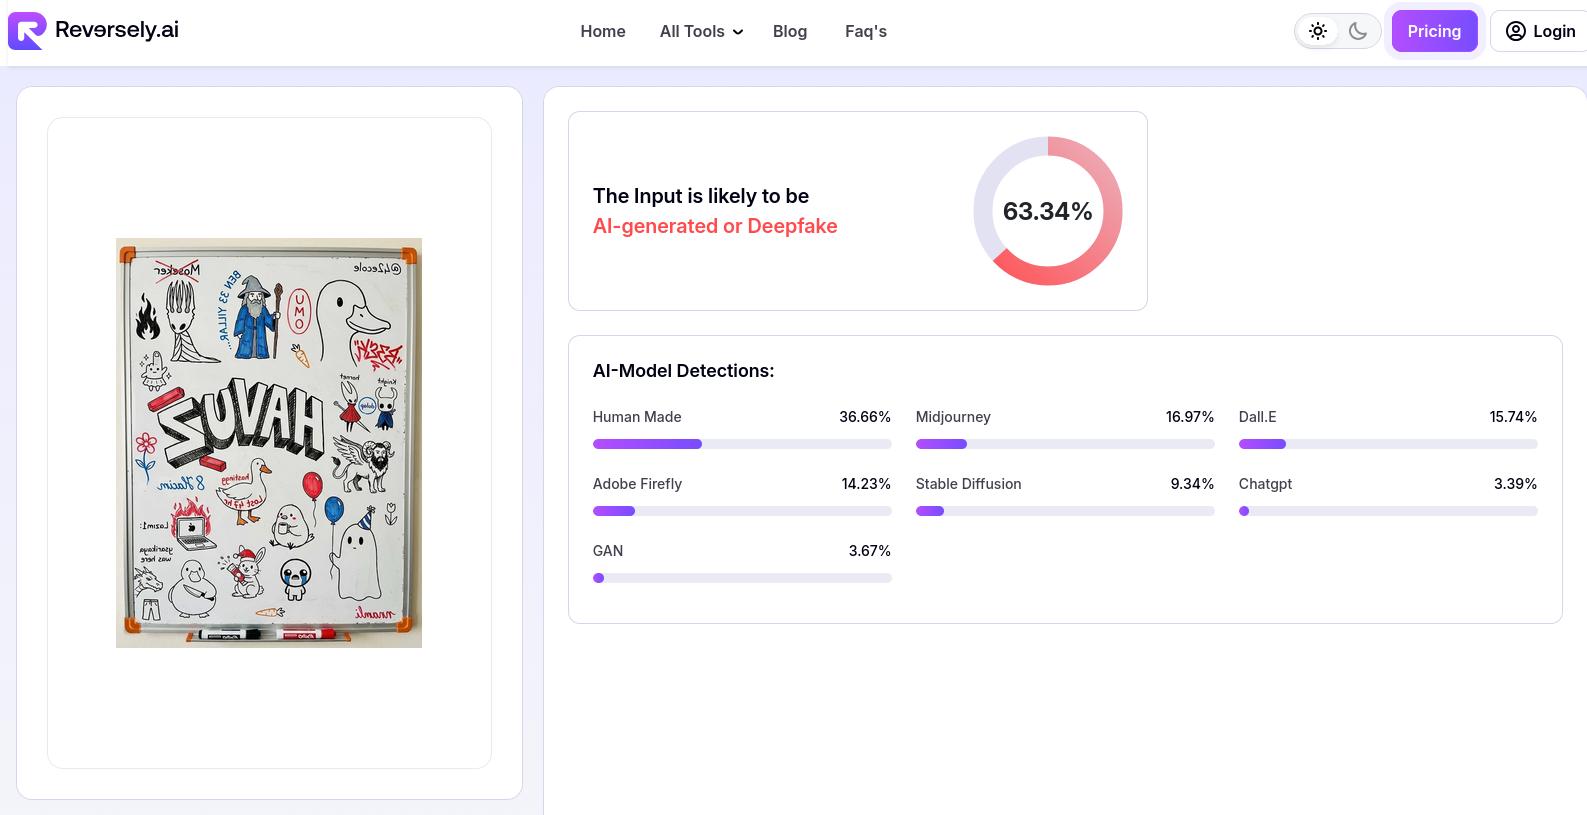
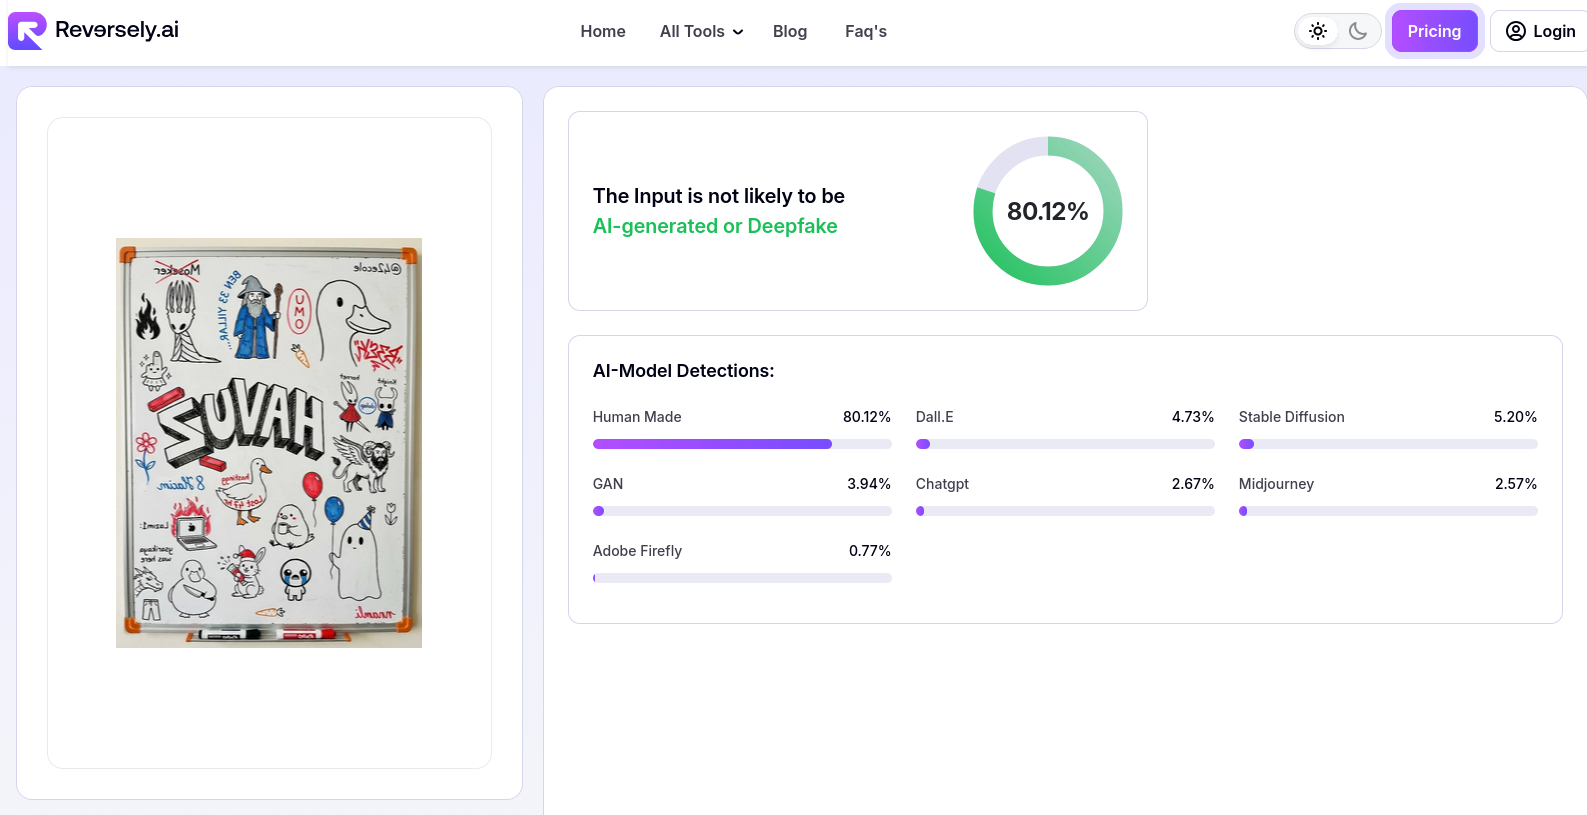
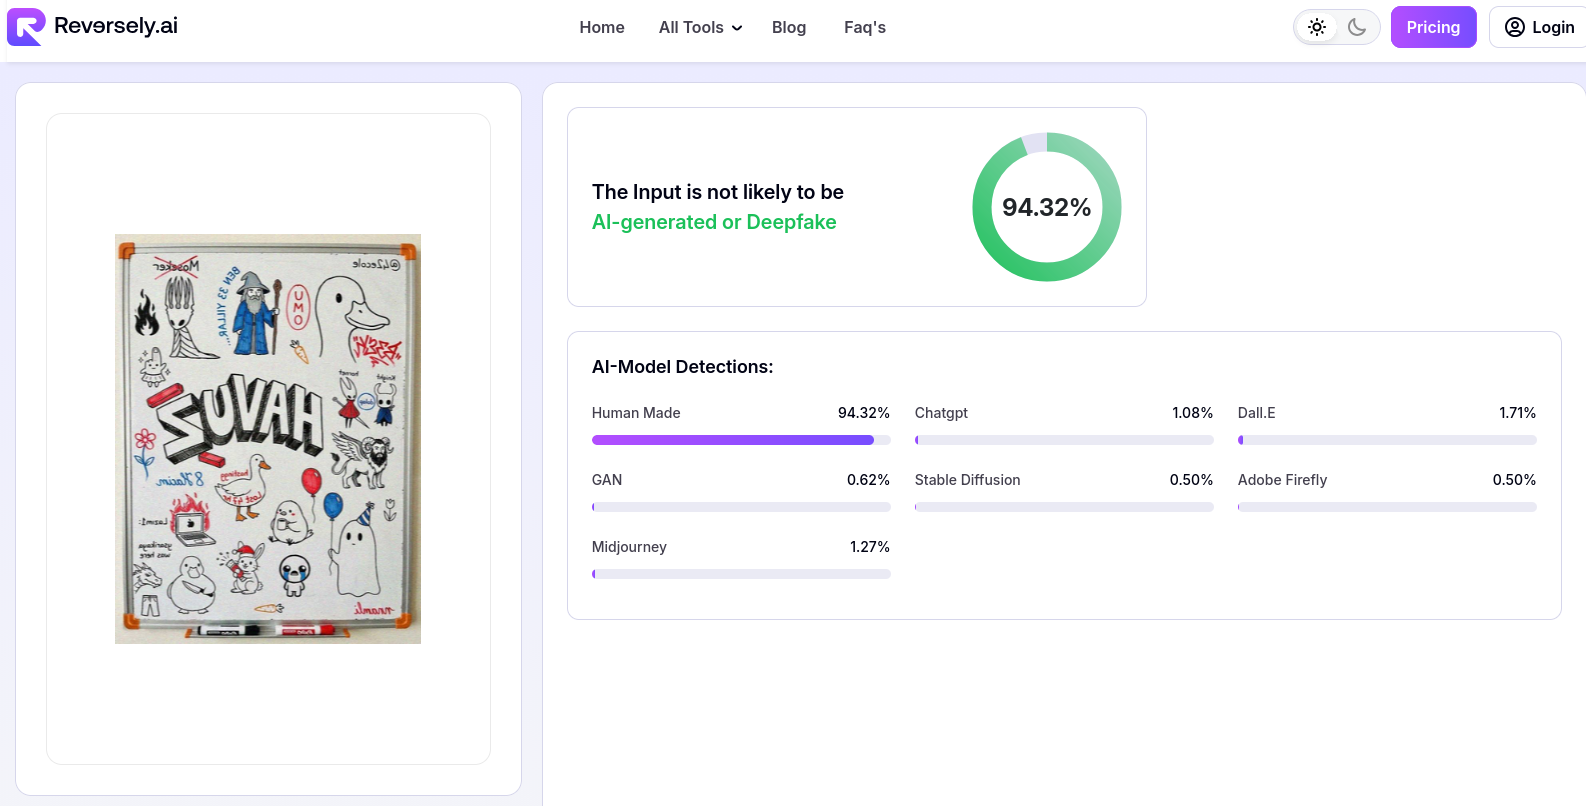
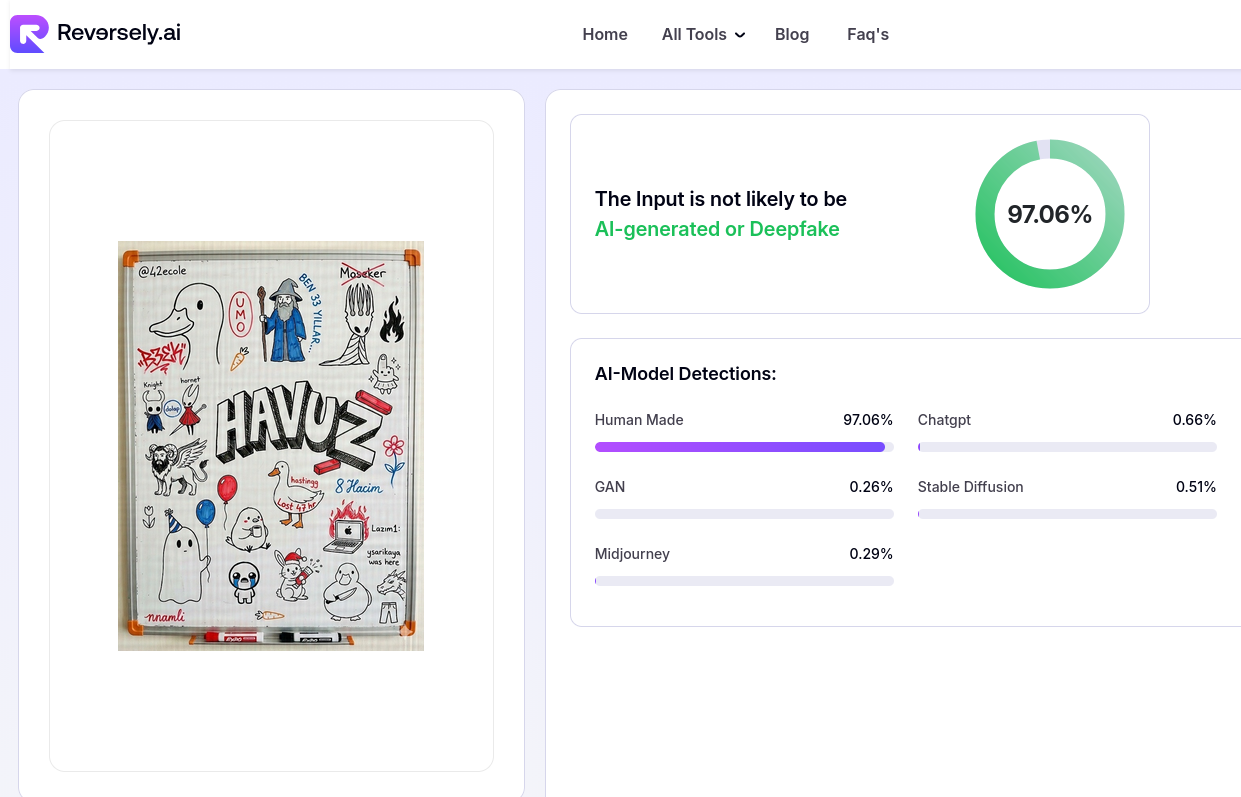
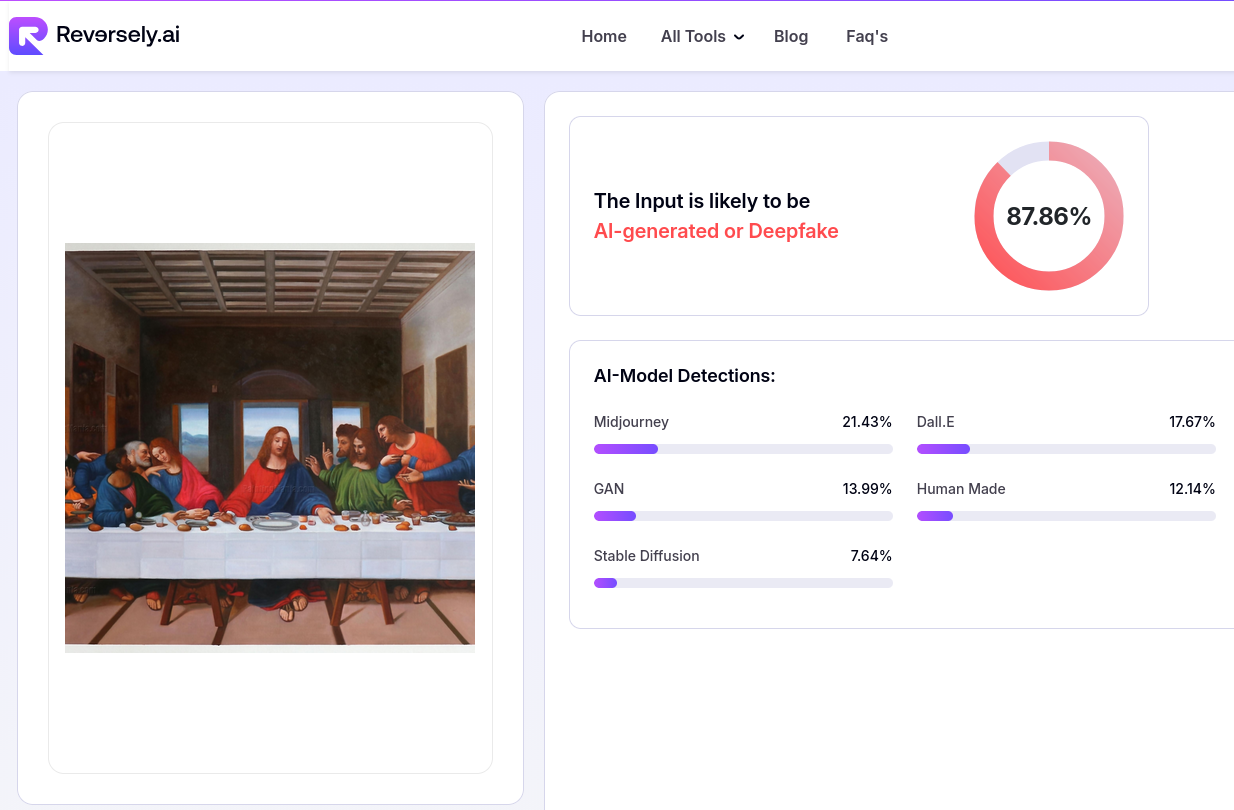
And look at reversely.ai’s result, in this next 3 screenshots, I uploaded the same image 3 times in a row:
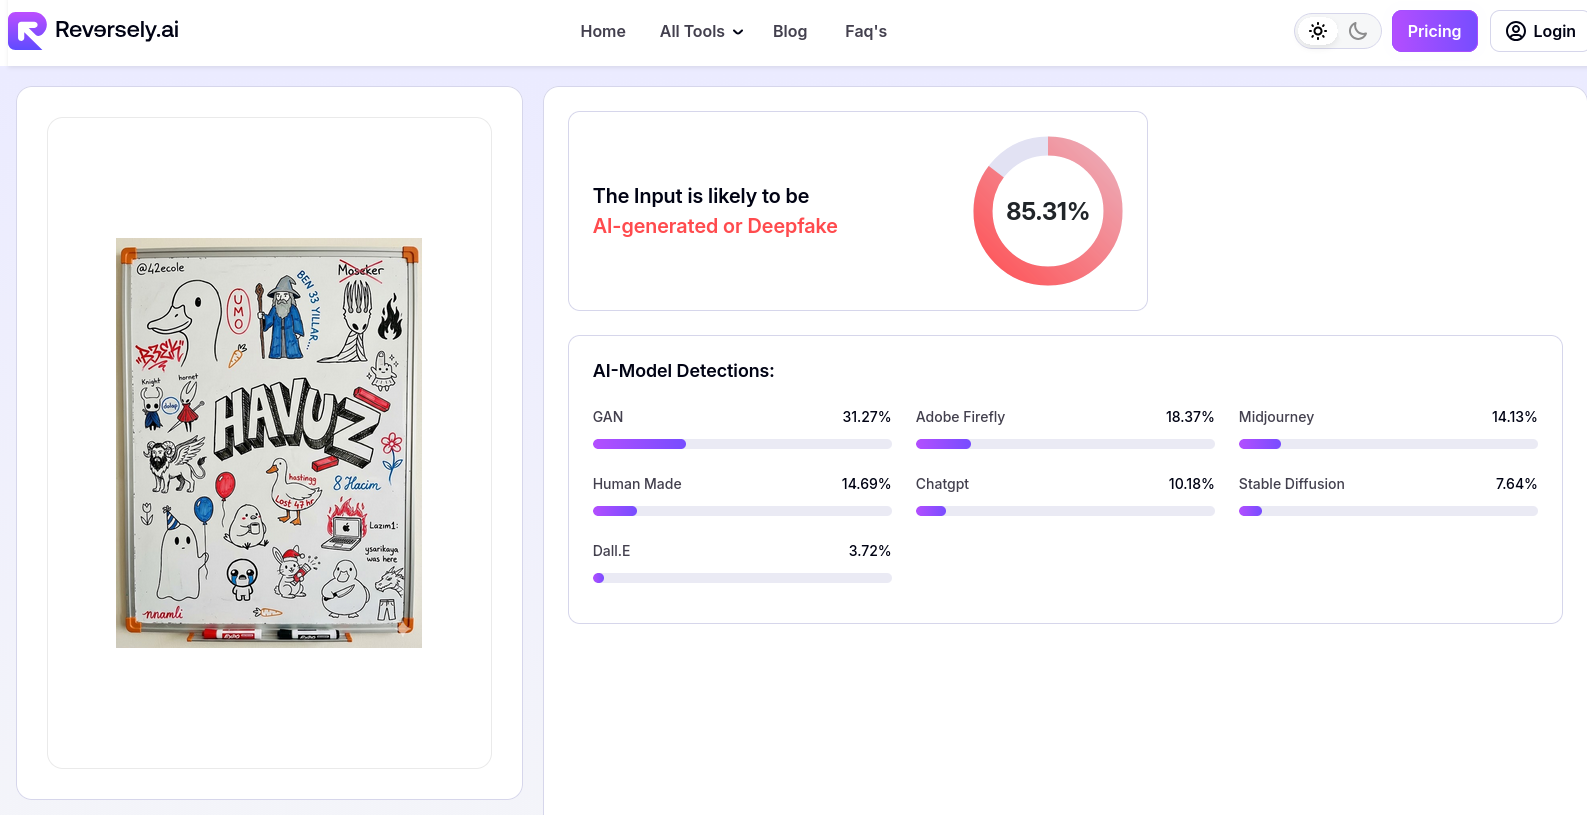


Yes, the AI detection is consistent, but it seems like the “AI-Model Detection” thing is just for show. It changes every time I upload the same image.
At least we found some websites that have a better AI detection algorithm. Now let’s try to trick them.
First, I tried to cover the Gemini icon at the corner with a small black circle.
A little improvement. Now, I removed the icon with Photoshop.
A little more. Now, I flipped the image horizontally.
A slight improvement again. Now let’s start editing the image. But first, we need to understand what to edit.
AI detectors don’t see images the way we do. They aren’t looking for 6th fingers or melting text characters. They are looking for overall patterns in the image.
A picture taken with a camera has the pattern of that camera sensor and lens. It has its own grain and noise. But an AI-generated image is mostly soft and smooth with very little noise. This is because of how AI image generators work. If you have heard the term Diffusion before, that is the name of this generation type. These Diffusion Models start with random noise and gradually remove it while paying attention to the prompt. They try to recognize the patterns in the noise that resemble the prompt and enhance those patterns while removing everything else.
So you see, what AI images don’t have is noise. Also, adding a little blur can help because AI images are usually very sharp and clean.
First, I added some blur to the image.
Looks like we tricked it already. It thought the image was 80% human. Now, I added some noise to the image.
Now it’s almost perfect. It thought the image was real with 94% confidence.
So actually, this is what AI detectors are looking for. When they say “We are looking for things the human eye can’t see”, this is what they mean.
Also, even though the explanation wasn’t correct, the detection algorithm of decopy.ai was correct at first. Let’s try the final image there too:
It thought the image was real too.
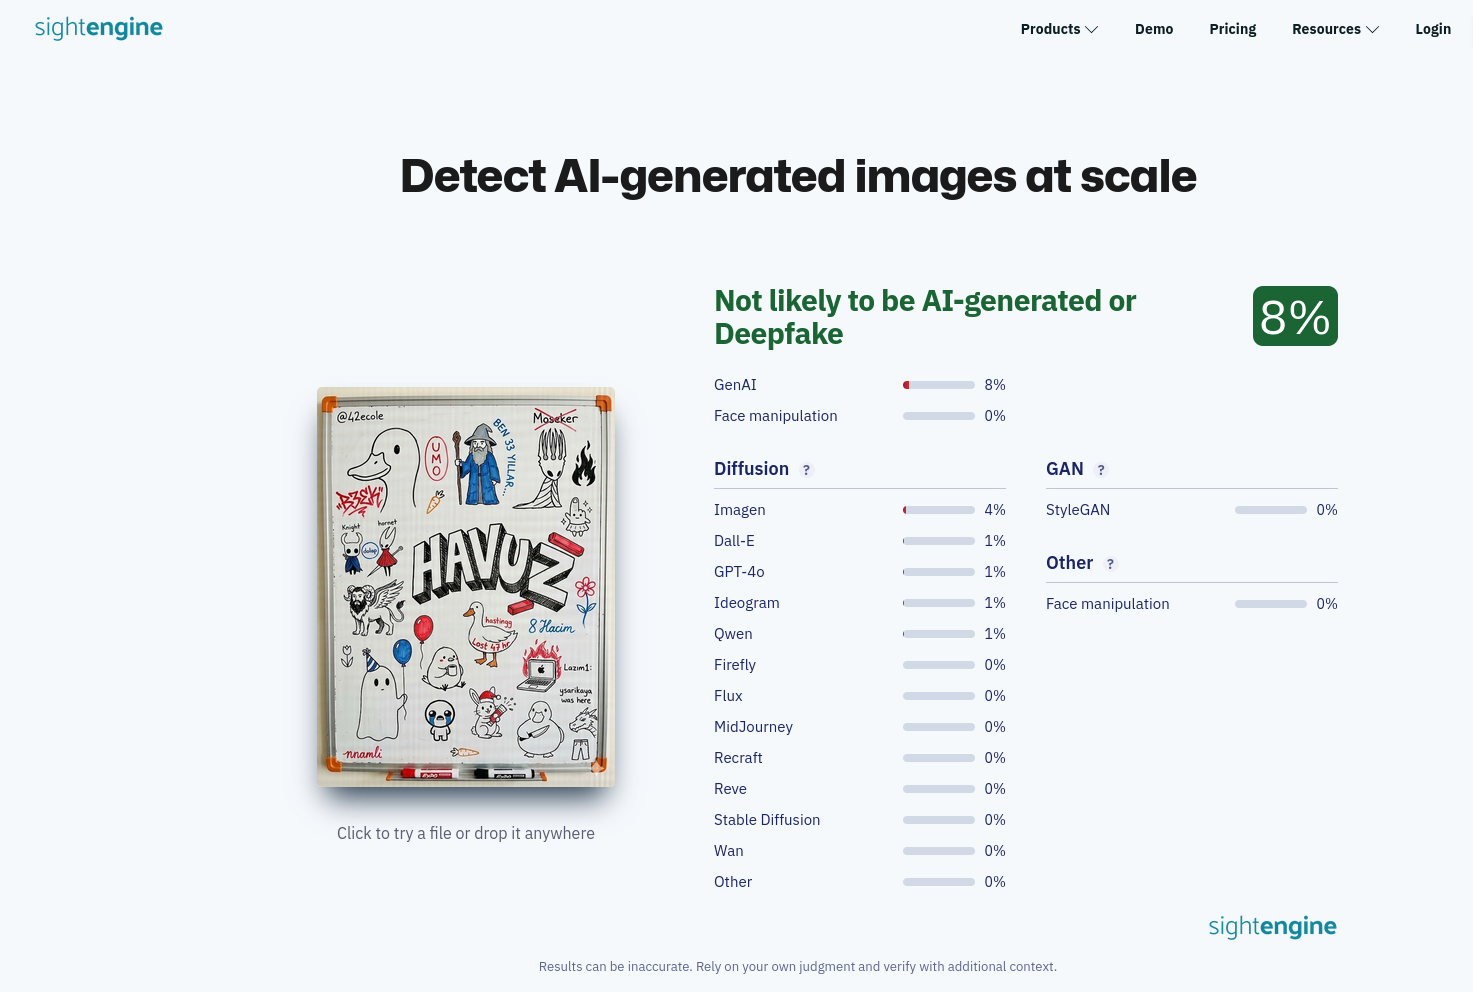
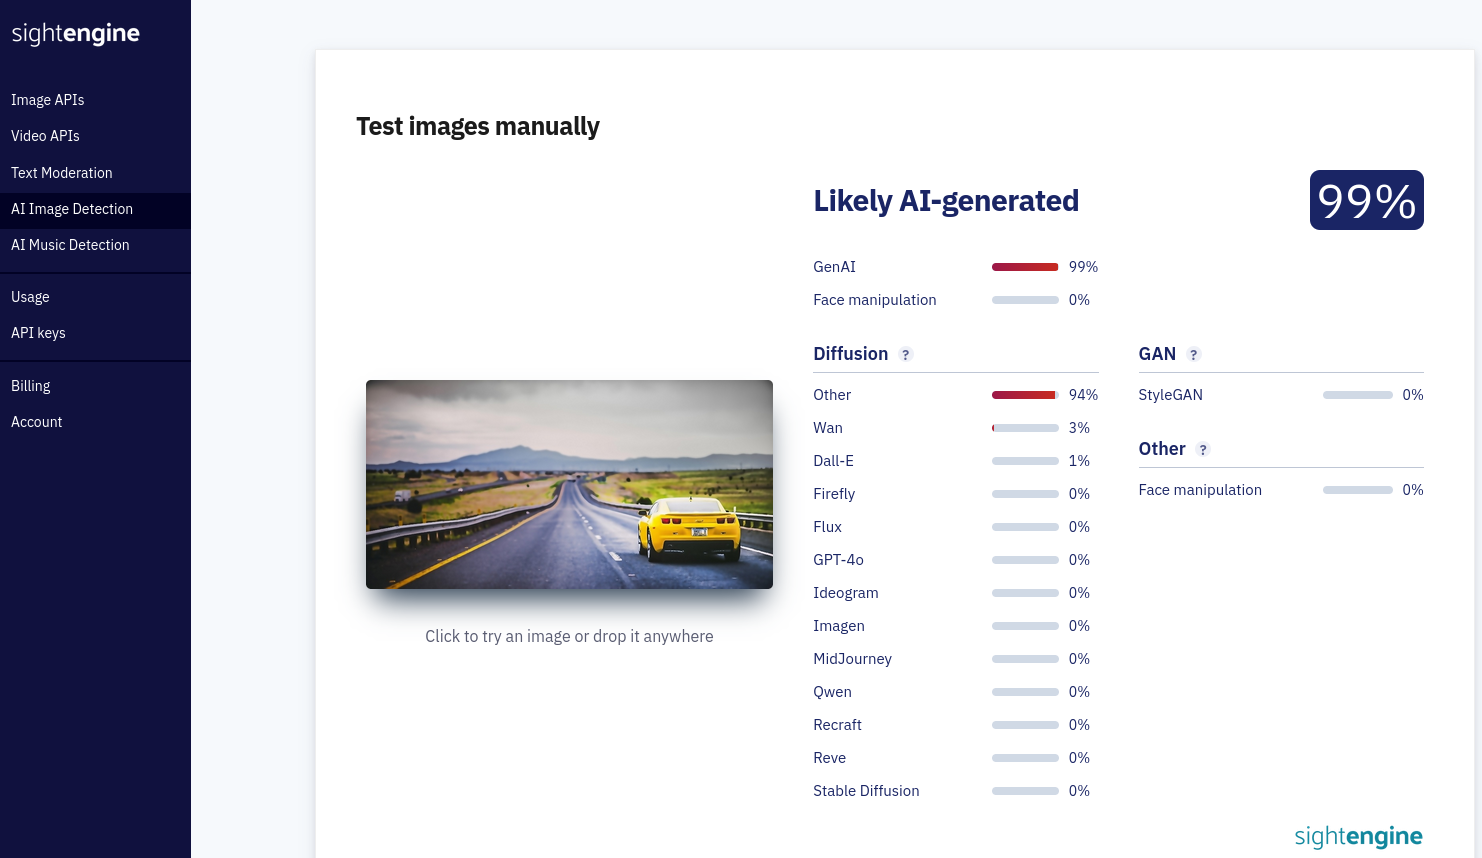
I wanted to try other services with this final image too. So I tried sightengine.com:
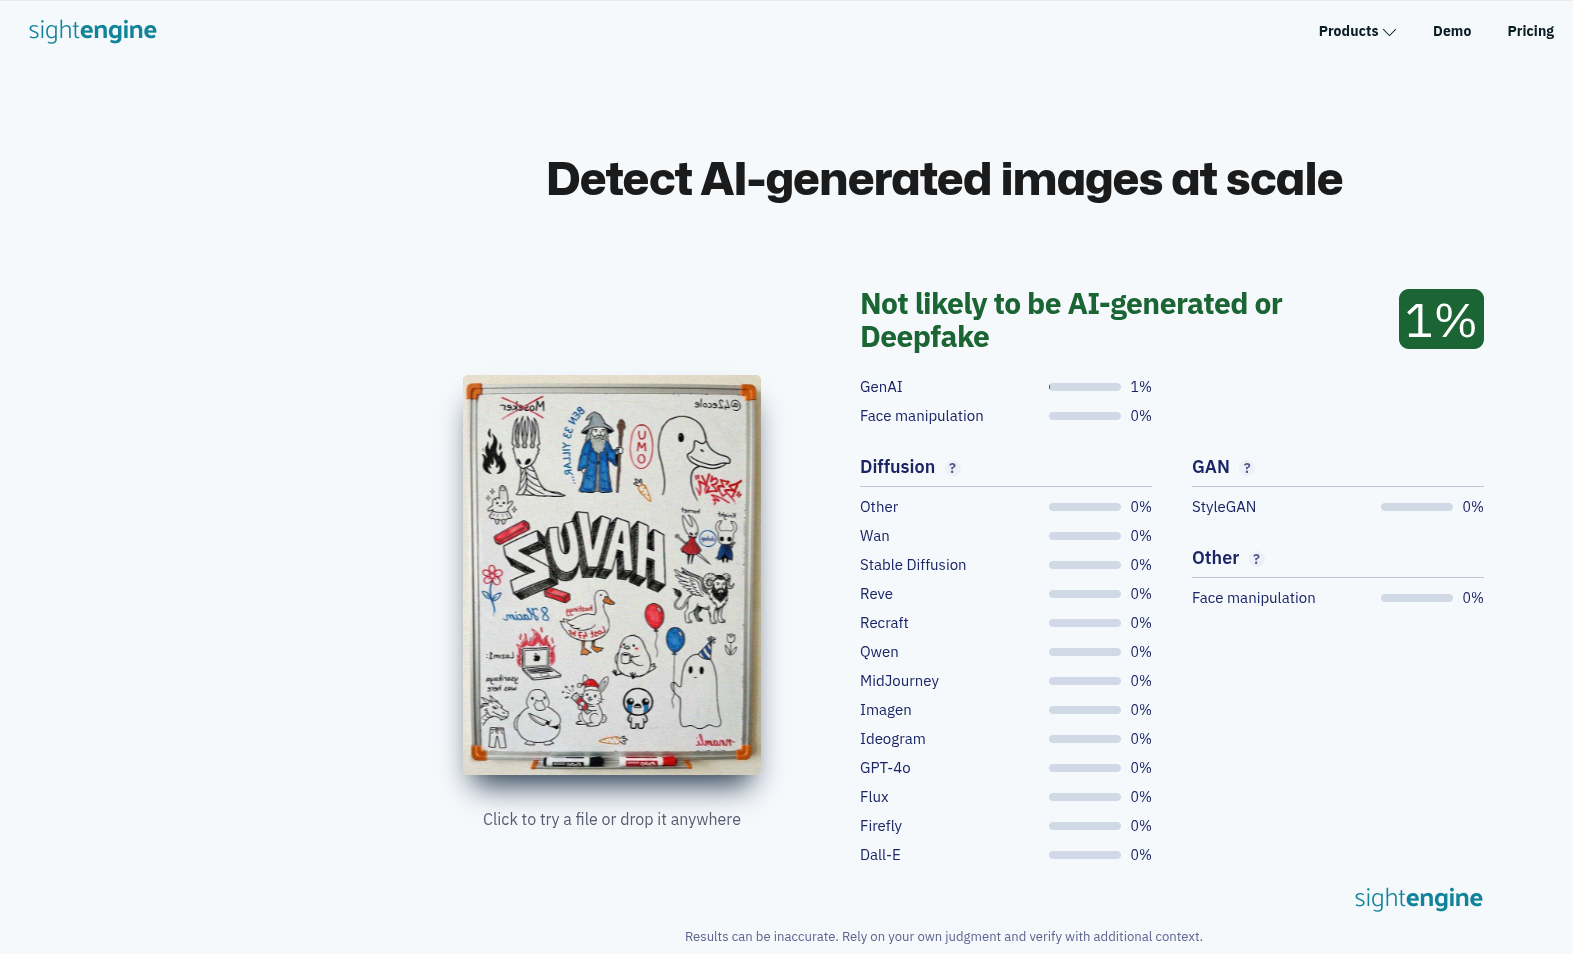
Actually, this result was the one that surprised me the most. sightengine.com is the first Google result for “AI Image Detector” and unlike other services I tried, it is a paid service used by very big companies. And it thought this image was real too.
False Positive
For false positives, I did the opposite. I took a real image and tried to trick the detectors into thinking it was AI-generated.
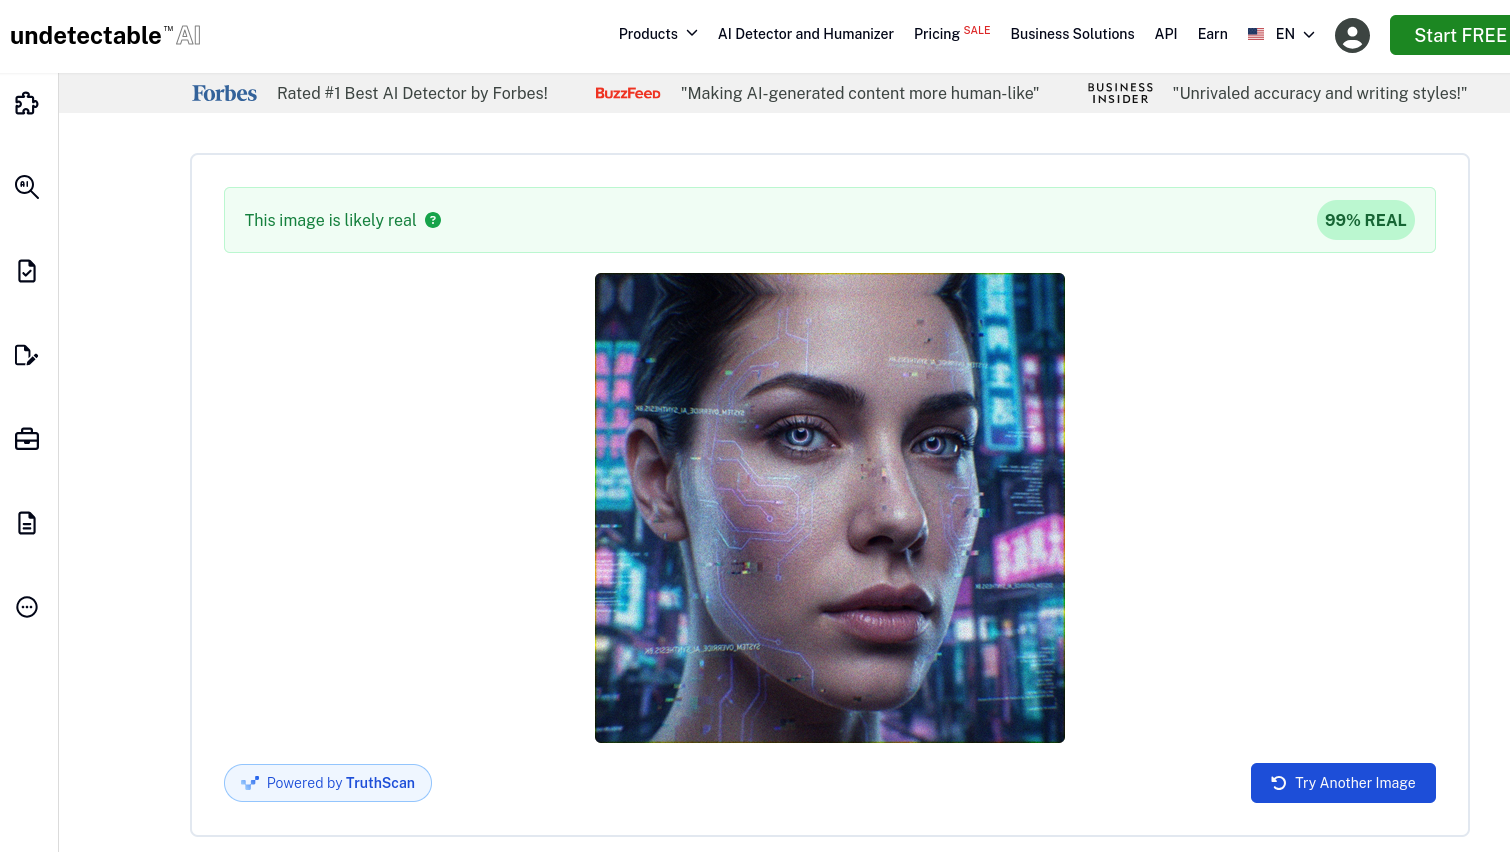
First, I tried methods other than editing the image, like changing the EXIF data. I took the EXIF data of the AI-generated image and put it into the real image using a tool called exiftool.
Just this small change was enough to trick some detectors.
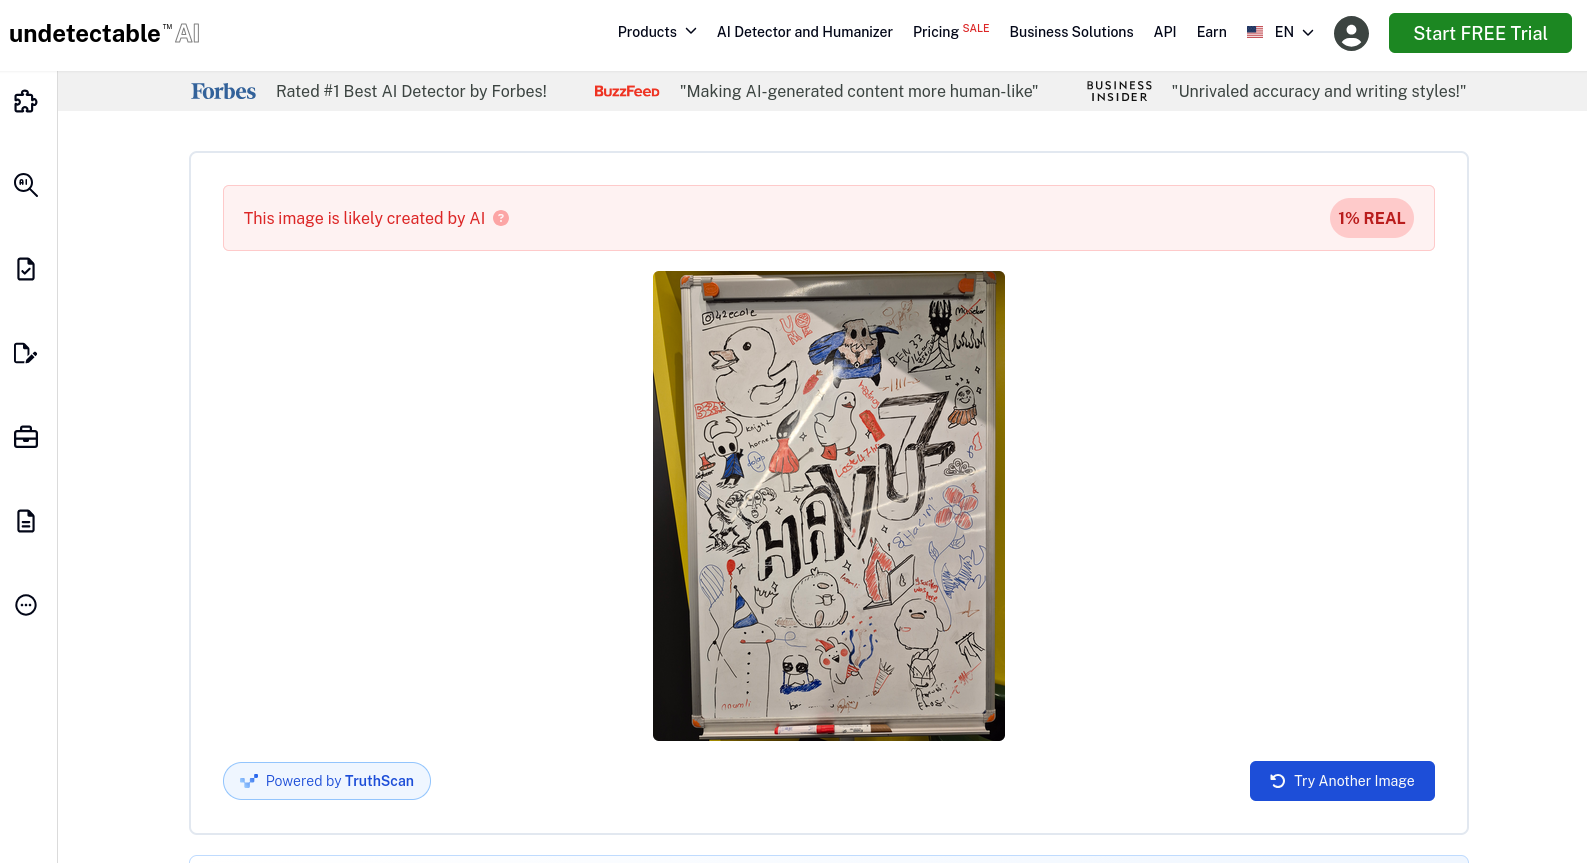
This also was surprising. undetectable.ai is also a very popular AI detector and, as you can see from the banners in the screenshot, they are promoted by big names like Forbes.
Also, look at how BuzzFeed and Business Insider promote them (about their AI text detector, not image). Looks like “AI Detection” isn’t a profitable market, so the main goal of these websites is learning what is AI-like and selling other services to make your AI-generated content “human-like.”
Anyway, as you can see, EXIF data shouldn’t be the only thing to look at when detecting AI-generated images…
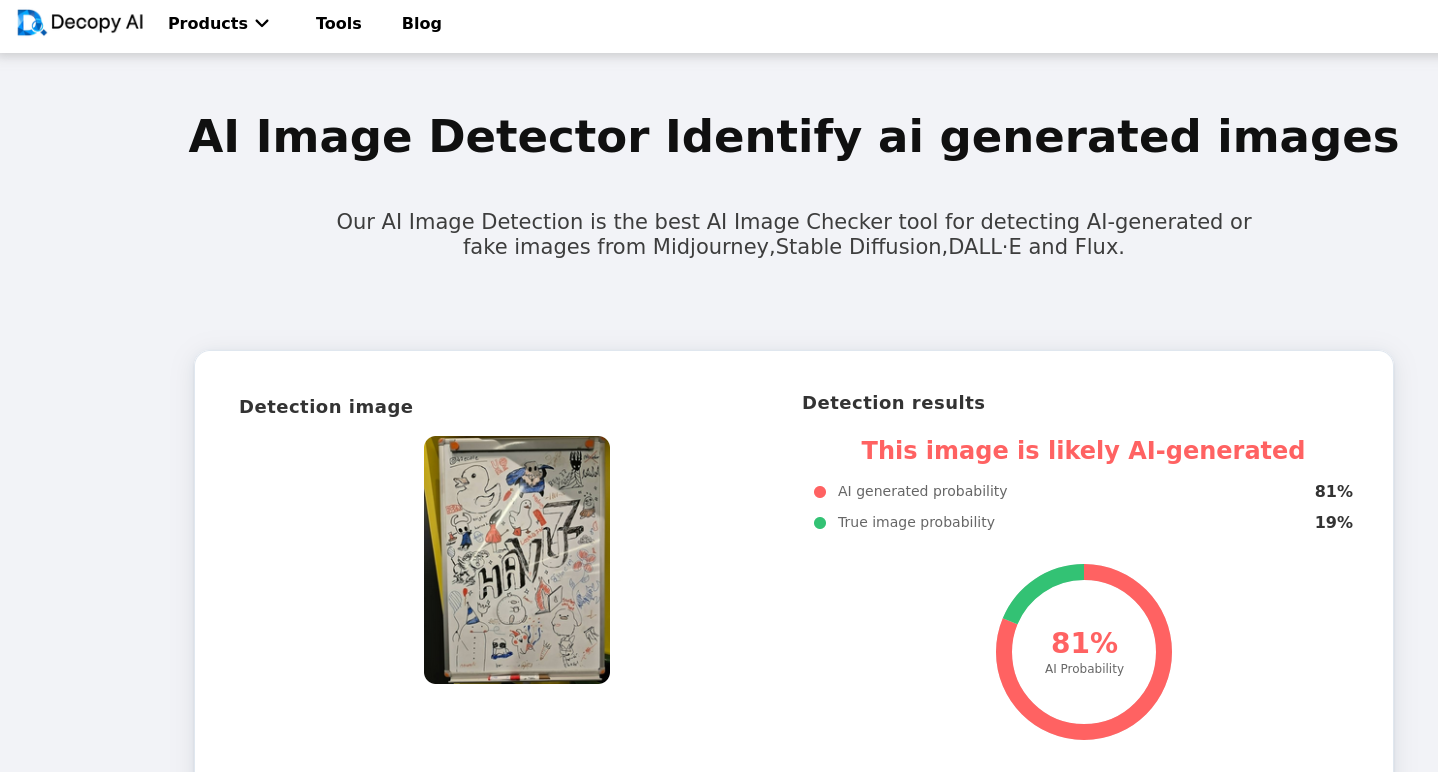
Now let’s try to make the image look more like an AI-generated image. I denoised it, slightly blurred it, and added a little unsharp masking.
With these changes, decopy.ai thought the image was AI-generated now.
Automating the Deception: Building a Forensic Tool
Manual editing proved that specific changes (noise, blur, EXIF data) could fool the detectors. But manual editing is slow. If we know exactly what parameters these detectors look for, can we automate the deception?
Yes, we can. And I did just that. I made a web app to deceive these AI image detectors. (You can find it at the end of this post.)
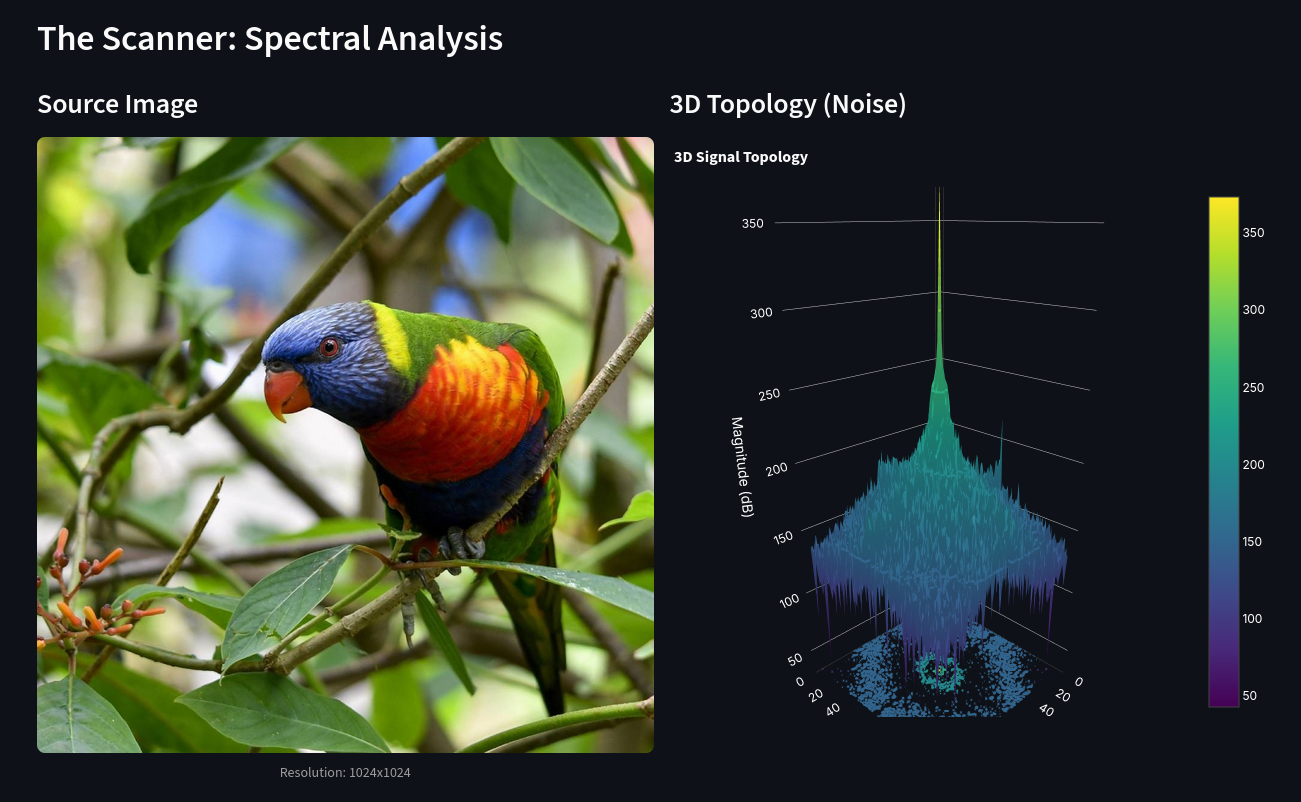

This app is divided into three sections:
- The Scanner: Checks various aspects of the image to give you an idea of how detectable it is.
- Check the 3D Topology of the image
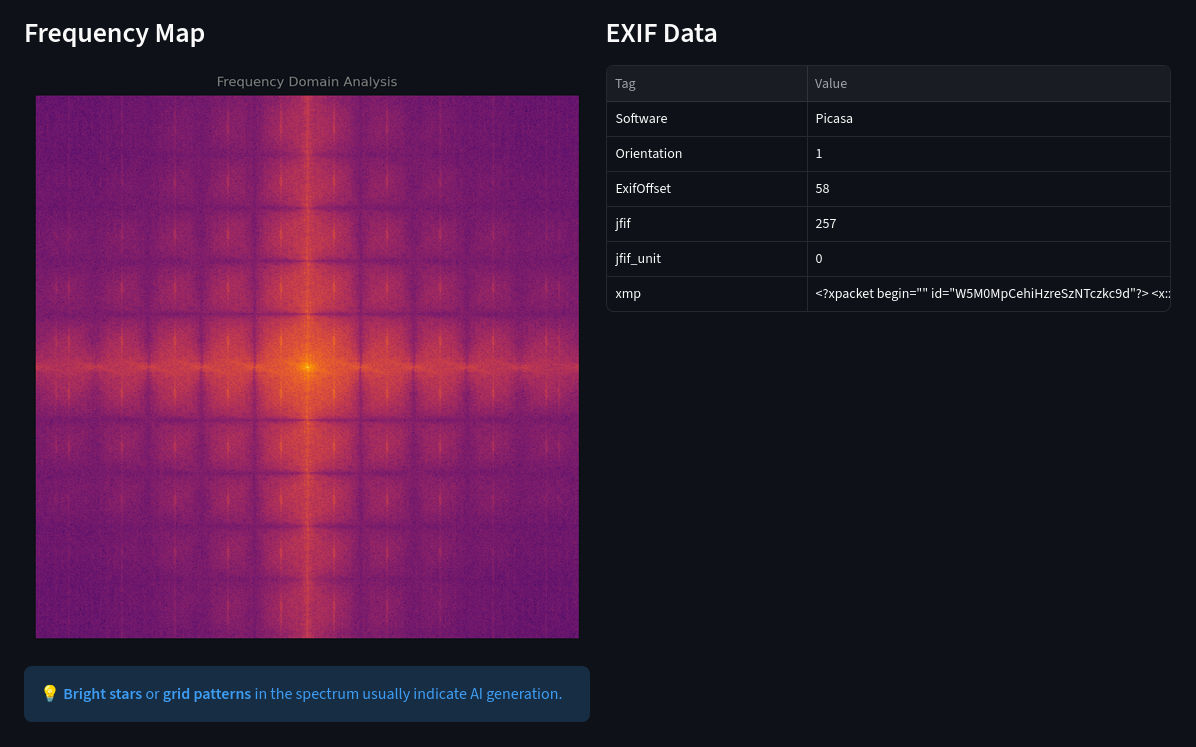
- Check the Frequency Map of the image
- Check the Exif Data of the image
- Humanizer: Modify an AI generated image to deceive the detectors into thinking it’s a real image.
- Crop the image in a different aspect ratio
- Change the perspective of the image slightly
- Flip the image
- Add lens distortion
- Add Bayer Sensor Softness
- Add ISO Grain
- Add camera info to EXIF data
- Add GPS location to EXIF data
- Faker: Modify a real image to deceive the detectors into thinking it’s an AI generated image.
- Crop the image in a different aspect ratio
- Add spectral grid artifacts
- Add smoothness that is common in AI images
- Add unsharp mask to enhance edges
- Add Chrominance blur
- Add AI Model tag to EXIF data
- Add prompt info to EXIF data
And it works better than I expected. Here are the results of Humanizer and Faker modifications on the same detectors we used before:
Humanizer/False Negative
I only used the services that gave good results before. So I used reversely.ai, decopy.ai, undetectable.ai and sightengine.com again.
Faker/False Positive

Future of AI Detection: C2PA
Throughout this experiment, we exploited a fundamental weakness in current AI detectors: they are Probabilistic.
They look at pixels, calculate the probability of noise patterns, and guess: “I am 94% sure this is human.” As we proved, we can manipulate those probabilities by tiny modifications.
But the industry knows this. That is why Adobe, Microsoft, Sony and others are pushing for a new standard called C2PA (Content Credentials).
C2PA is a way to cryptographically sign media files (images, videos, documents) with metadata about their origin. For example if your digital camera supports C2PA, it will cryptographically sign every photo you take with it’s hash. So even if a single pixel is changed, the signature will be invalidated.
If you modify that photo with Photoshop, Adobe will add a new layer on top of that signature, saying “This image was modified with Adobe Photoshop on this date by this user.” Like a git history for media files.
So, C2PA doesn’t care about pixels, noise, or 6th fingers. It is Deterministic. It uses cryptography to sign the file’s history.
But this method has its own problems:
- It requires widespread adoption. Both content creators and consumers need to support C2PA for it to be effective.
- It’s only for verifying if something is not AI-generated. It can’t detect AI-generated content.
Is C2PA Foolproof?
Yes, and no. C2PA is a significant step forward in content authentication, but it’s not foolproof.
Technically, you cannot trick the math. You can’t just add some noise or blur to a C2PA file to fake a signature. If you change even one bit of the file without the private key, the validation fails instantly.
But while we can’t break the encryption, we can just bypass it.
Stripping the C2PA Data
The C2PA data is just metadata attached to the file. It is very easy to remove.
If you modify an image that has a C2PA signature, it will invalidate the signature and will tell ‘this image is edited’. But if you basically strip that signature, you are left with the modified image and no record of the changes.
It doesn’t prove the image is fake, but we are back to square one: an unverified file with no history. If the file has no signature, C2PA can’t tell you anything.
(The only risk here is if we reach a future where C2PA becomes mandatory. If platforms start rejecting unsigned files, then stripping the signature would make the file unshareable. But we aren’t there yet.)
Bypassing the Digital Chain
With Analog Loophole you can make your AI-generated content signed as real. Currently, C2PA has no defense against it. We can essentially “launder” an AI image to give it a legitimate digital signature by moving it from the digital world to the physical world.
Here is how you do it:
- Generate a realistic AI image.
- Display it on a really good, high resolution 4K monitor in a dark room.
- Take a photo of that monitor using a camera that supports C2PA.
The camera will cryptographically sign this new photo. The C2PA signature will truthfully say: “This is a real photo, taken by a real camera, at this real time.”
Or you can generate a drawing with AI, print it with a high-quality printer, and take a photo of that printed drawing with a C2PA camera.
In both cases, the cryptography is valid. The signature is authentic. But the content is still a lie.
C2PA proves the origin of the file, not the truth of the reality. As long as light has to hit a physical sensor to create a photo, there will always be a way to trick the system.
Conclusion
I started this experiment to prove my feelings about AI detectors being unreliable. I have to say, I am happy with the results. Learning about how these detectors work and tricking them was a fun experience. Also, I publicly released the web app I made for this experiment. You can check it out at forensics.alig.dev.
I host it myself, so it may be down sometimes. The file size and resolution are limited. If you want, you can download the source code and run it yourself without limits.
So, the main takeaways from this experiment are:
- AI detection is not as profitable as AI generation. They always will have less money than Google or OpenAI, so they will always try to catch up.
- And most AI Detection tools are just entry points to sell you other services; thus, “providing the best detection service” is not their priority.
- Their detection algorithms are mostly unreliable and can be easily tricked with simple methods.
- For media, we are moving away from guessing games toward cryptographic verification like C2PA. This is a huge improvement, but as long as the “Analog Loophole” exists, there will never be a 100% perfect way to detect fake content.